
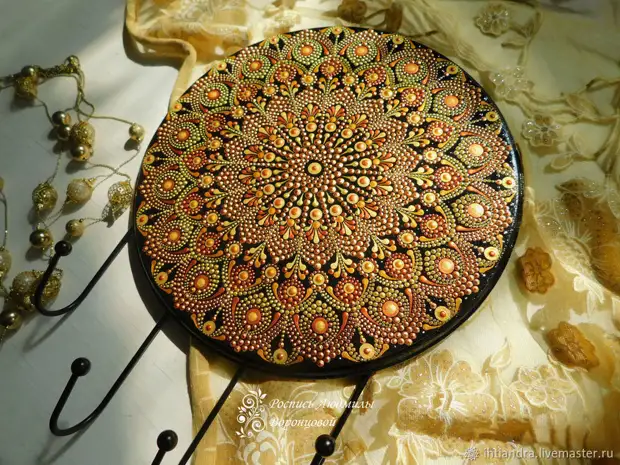
Dot-Art is one of the species of point painting, which has recently obtained wide popularity. Large, voluminous peas, gossiping in openwork patterns of the mandala, is amazed by their beauty, geometrically verified pattern, harmonious color transitions.
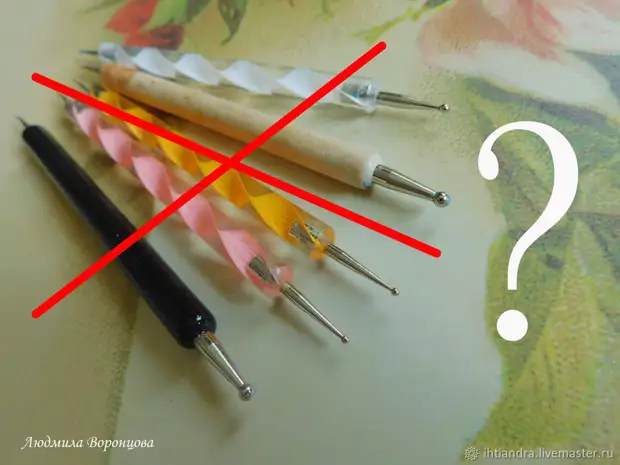
As a rule, in such a painting to obtain the effect of relief and bulge point, special metal "brushes" are used - dots.
Dots - special tools for applying points of different diameters. Present a metal rod with a ball at the end. Widely applied in nyl-design, but also widely used in other types of decorative art.
However, what to do if the dotes are not at hand, and the purchase of expensive special wide rods (for applying particularly large points) requires high costs?
My master class on how to create an original panel in the technique of "Dot-Art" without applying dotes, and using non-slip handy tools that will be found almost every wizard.
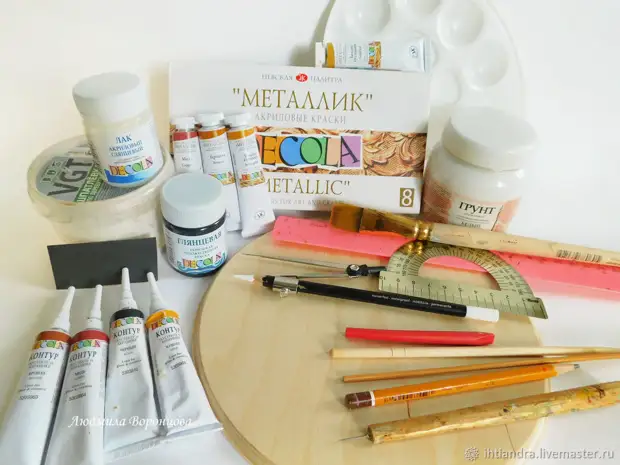
To work, we will need:
1. Wooden blank.
2. Acrylic soil (preferably black), spiteling, sandpaper.
3. Black acrylic DECOLA paint.
4. Acrylic paints "Metallic" Decola (Sustal Gold, Gold Aztec, Copper, Bronze).
6. Acrylic DECOLA contours: Gold, copper, bronze.
7. Acrylic Glossy Decola varnish.
8. Palette.
9. Wide brush.
10. White Universal Pencil (Wood, Glass, Metal).
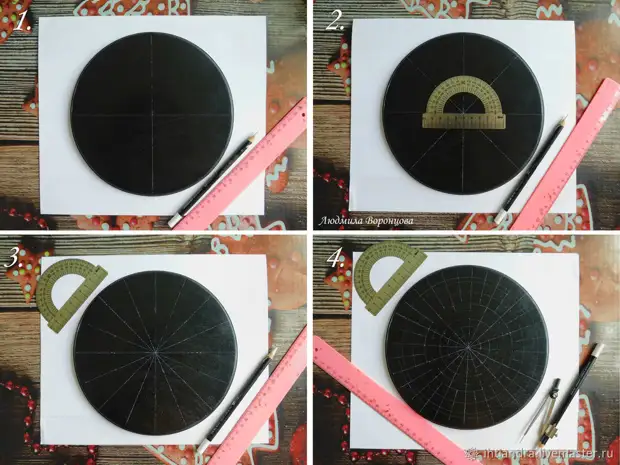
11. LINE, TRANSPORT, CIRCULAR.
12. For applying points: Pencil with a smooth round tip, sushi sticks, shampoo chopsticks for pods, contour spout and so on.
13. Thin awl or needle.
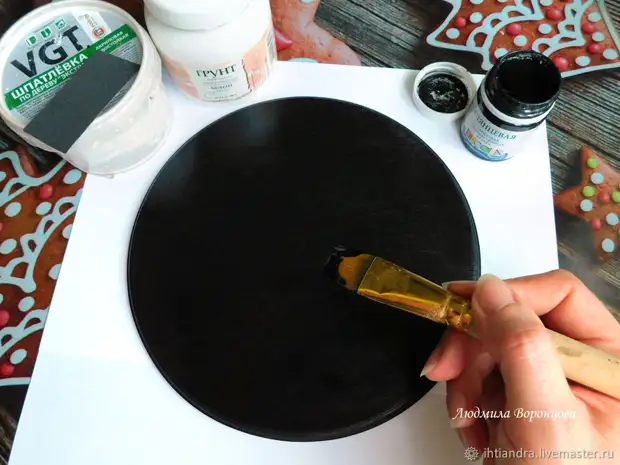
Wooden workpiece must be prepared for painting. Grinding emery paper, putty, primer - necessary operations when working with wood.
Now you can apply a wide brush - background: black. I use acrylic art paint Decola.
White universal pencil apply markup. It is very important to keep accuracy. Pay special attention to this stage. Circles (photo 4) I draw a circular in an arbitrary order.
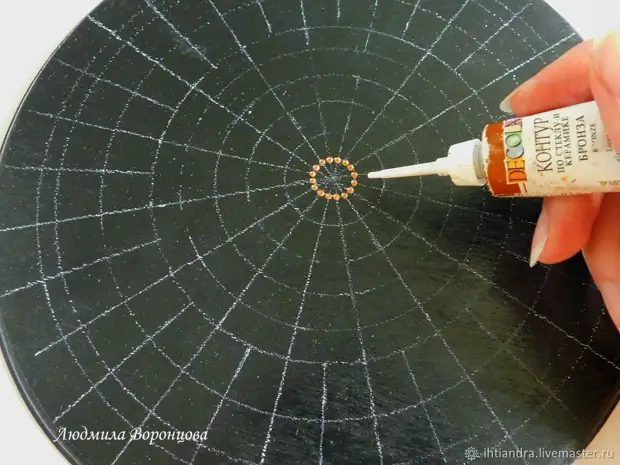
We start painting from the center. So far, in the painting we use ordinary contours.
In each subsequent row, we squeeze the cuttings of the larger size by placing them in a checker order.
We use the method of smooth "flowing" dimensions: from greasy to a smaller and vice versa.
The drawing itself is invented along the work. After all, Dot-Art is one of the types of meditative painting.
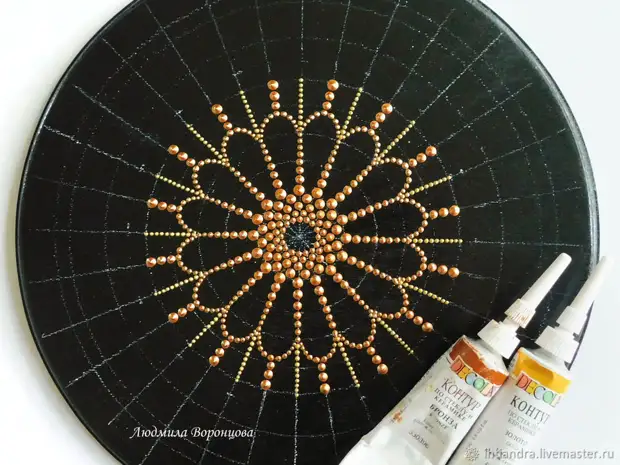
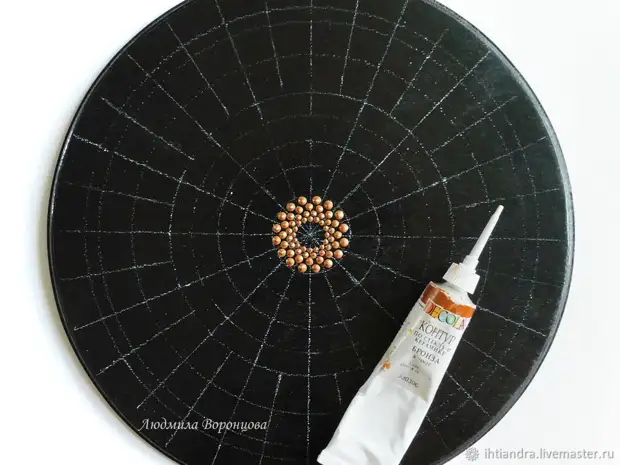
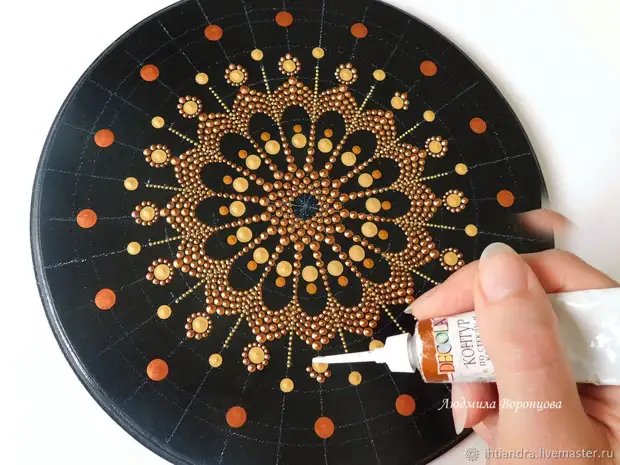
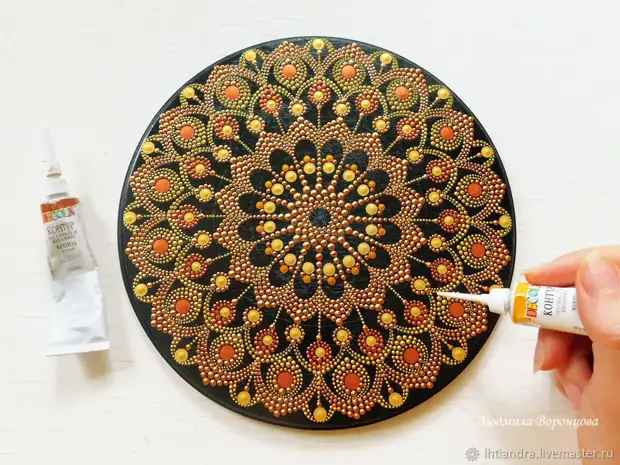
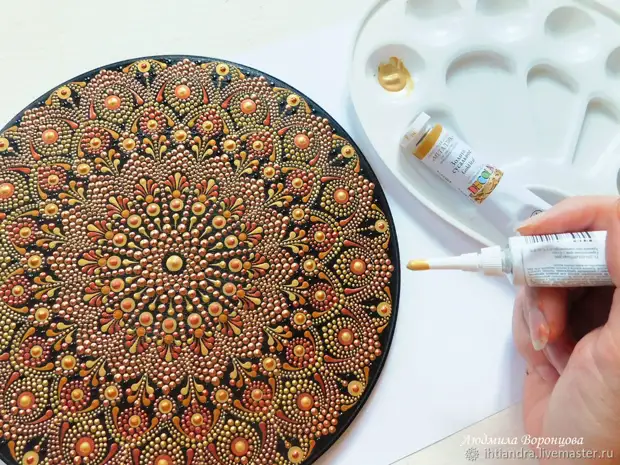
Until now, in the painting, we used only contours: bronze and decola gold. We approached the most interesting: applying large, volumetric points!
And here are my assistants! The photo shows: a pencil with a smooth, slightly convex tip, a plastic chopper-chisel (from a children's set "Young archaeologist"), a wooden wand for sushi, a shapecur wand for a suvlaki, directly by the contour itself (we are interested in a long-nosed nozzle lid .
Each "tool" has its own diameter. This is exactly what we need to apply different points.
So, let's begin! The plastic wand is looming with a flat end to acrylic paint (tin gold, decola) and gently put the middle-size points. It is easy, however, the beginners advise to work on some surface.
P.S. If you do not have a similar "tool", you can use a thin pencil or a wooden tip of the sushi stick (wide end).
I put the dots slightly smaller with a stick for sushi.
Note, if you use a wider end, the dots are obtained more (according to size almost coincide with the first shrined red plastic sticks).
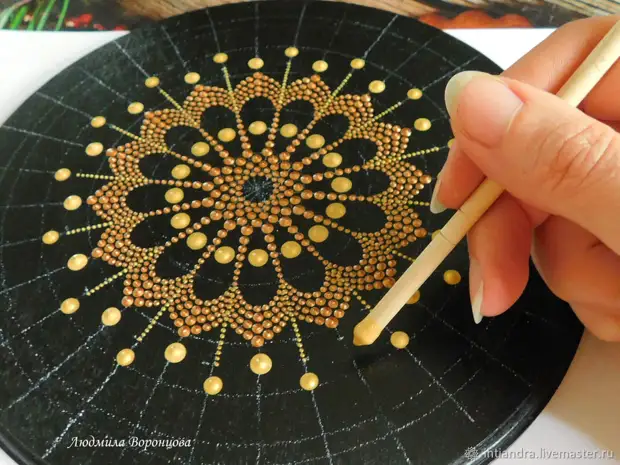
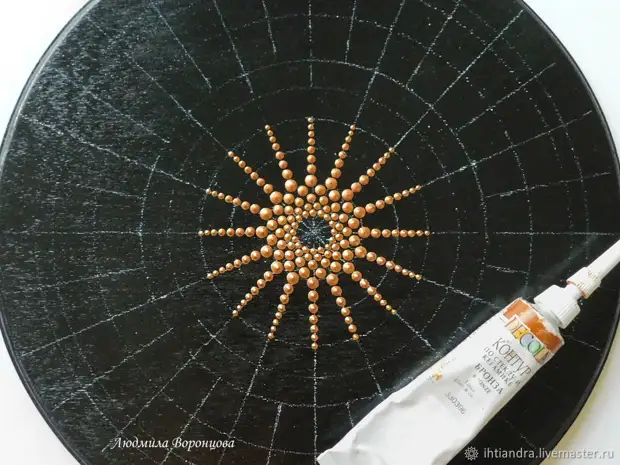
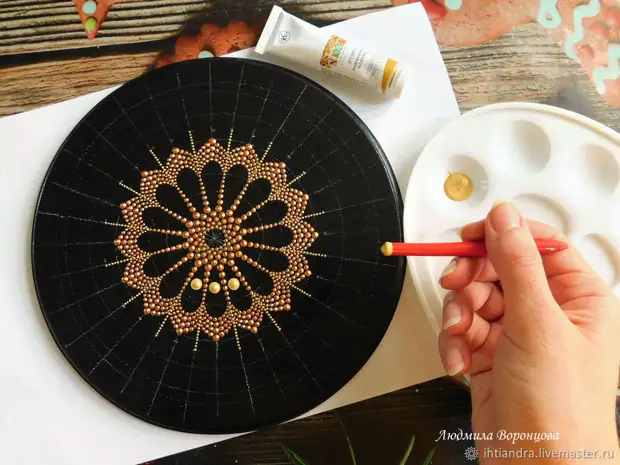
My favorite tool - pencil! Generously fan the flat part of the pencil in the paint (color of gold aztecs, decola) and put a beautiful, greasy point-pea!
To dots get well, it is better to immerse the pencil in the jar itself with paint.
A lodge for a row is small neat convex points. Here I used the same tint (Gold Aztec).
Actually, here is the intermediate result of our works. I repeat, drawing, the pattern is born in the process of work. Points of the pea are applied in any order.
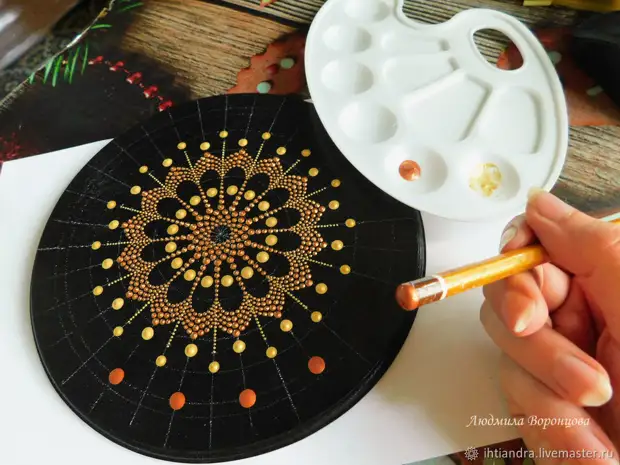
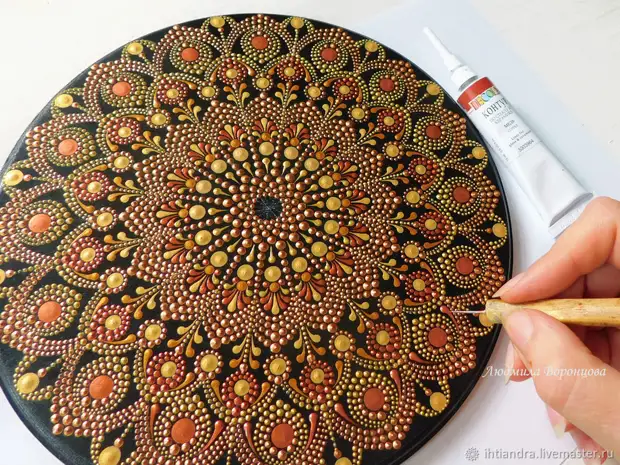
Now you need every large "pea" beautifully arrange. Returning back to the contours and describe large points with small dots using a smooth size of size, from more to smaller.
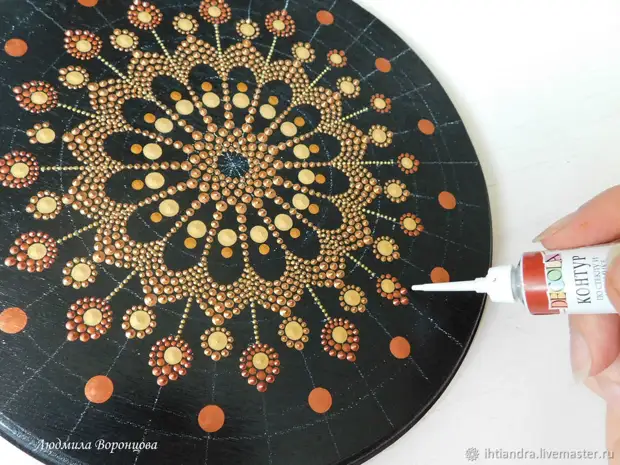
Formed empty black sites fill in point painting patterns, also using our contours (bronze, gold, copper). You can pre-apply with a white pencil markup.
We alternate painting with contours and "pseudo-dots", that is, by our "instruments" -cakes to apply large points.
Intermediate result:

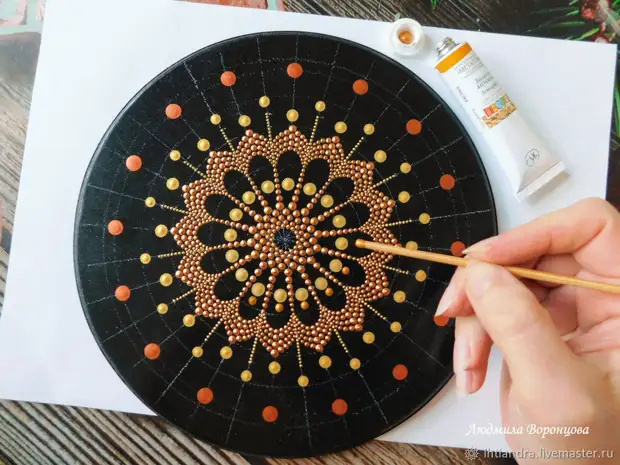
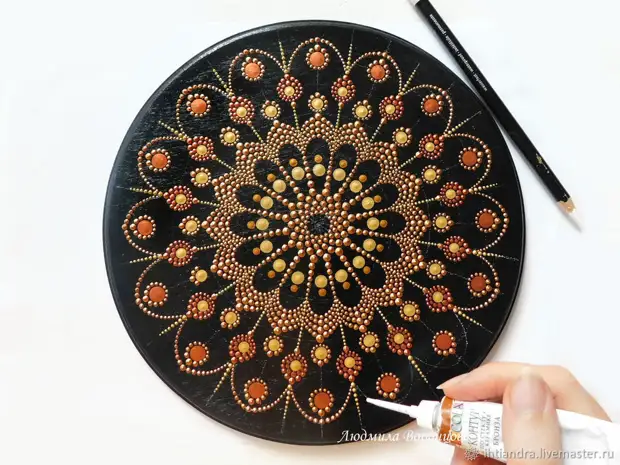
Next, it seems, there is no need to stop in detail at each stage. You can show your fantasy and finish work somehow in your own way. It is very interesting to invent patterns, that's so spontaneously. Filling emptiness, I painted dots contours.
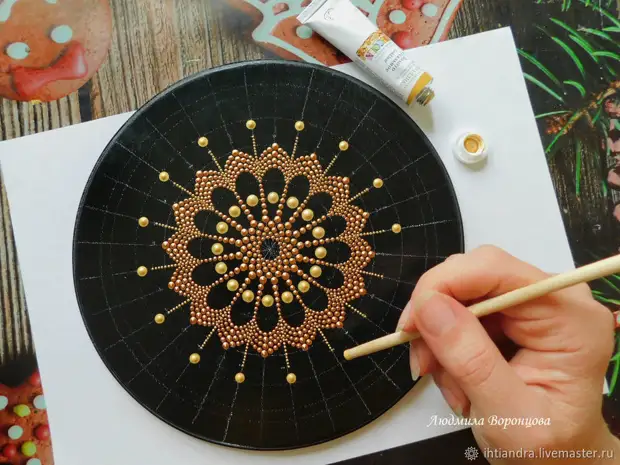
You can pull the point into long elegant drops using a needle or a thin sequel. Many masters use the sharp part of the Circular for this.
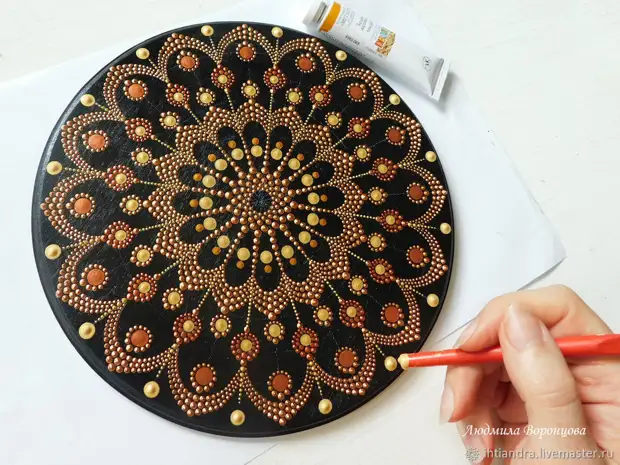
The places that I still decided to leave black, also decorate glossy dots (black contour, decola).
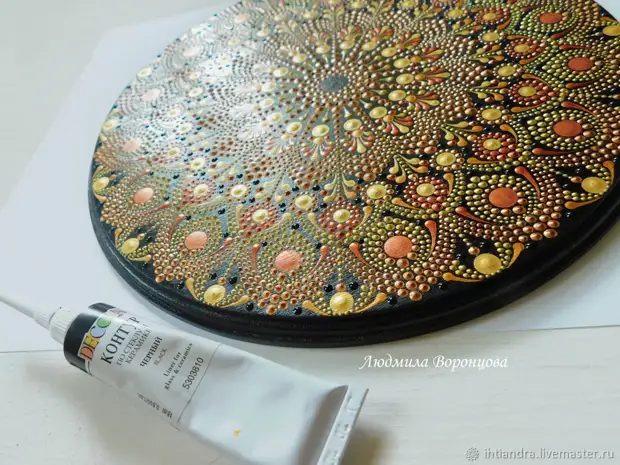
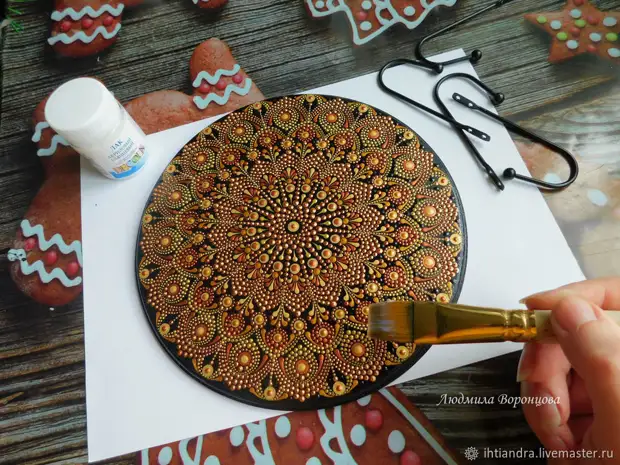
Important moment. In the course of filling the space of the pattern, we gradually remove our white markup, using a cotton wand moistened with a glasswash. If the lines are erased badly, you can neatly paint their acrylic black paint in some places.
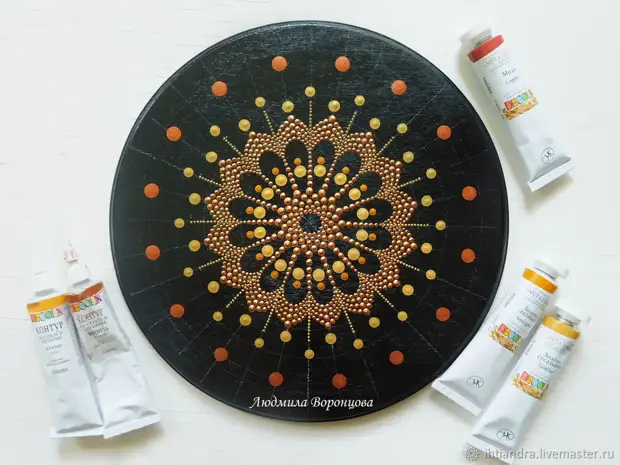
Our panel is almost ready. There is a small nuance.
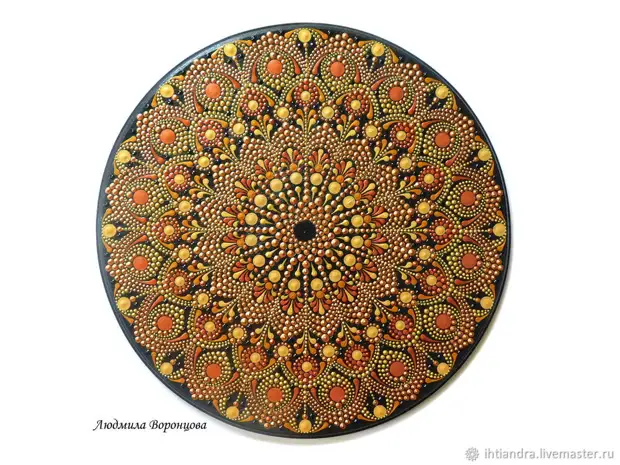
In order for the painting to look richer and more comprehensive, in each major point-pea we put a point of a smaller size (and, accordingly, another color). Plastic tip from the contour - the perfect device for this!
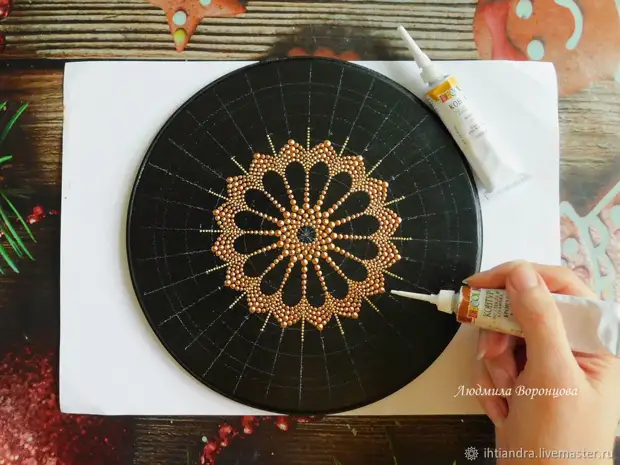
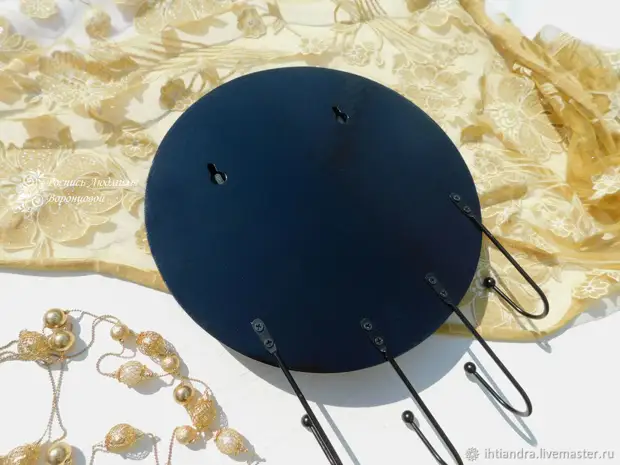
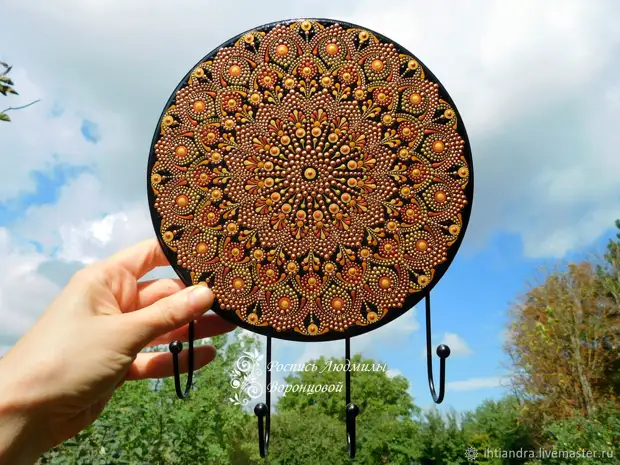
Fix painting acrylic glossy varnish Decola. Since I love functional things, invented fastening metal hooks to the panel.
It turned out a very elegant and beautiful key (or holder for beads and chains)!
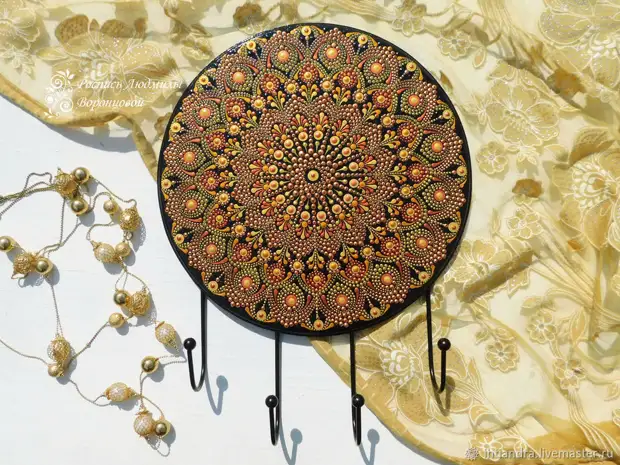
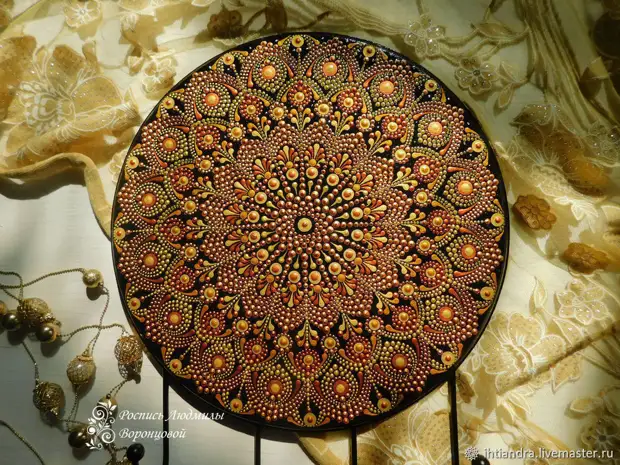
I called my work "Awakening the Sun" so that it, as a real shine, radiates light positive energy and good. After all, the sun is a great strength, thanks to which everything is alive!
Thanks for attention! Put husky, write comments, share your secrets of using "magic" tools. I will be glad!