
I offer a master class on the manufacture of Topiaria from candy. Here will publish a reduced option. You can consider in more detail at my blog http://skrapttt.blogspot.com/2012/04/blog-post.html

We will need:
- Vascular base for Topiaria (any vessel is suitable without a hole from a flower pot and an ordinary cup to a bucket of mayonnaise),
- residues from foam packaging,
- alabaster, gypsum or similar dry mix,
- wand for the trunk,
- twine or ribbons for decorating the trunk,
- Floristic oasis (can be replaced by a foam, frozen construction foam, twisted in the ball with newspapers, etc., can be found a lot of ideas),
- Floral corrugated paper green and color of your roses (I have a light pink),
- Toothpicks,
- Pashevaya film,
- thin tape,
- Tailent,
- sewing threads under the color of your roses, not very thin,
- Organza for finishing,
- various beads, butterflies, etc. For decoration,
- from tools - scissors, a gun with hot glue, a kitchen knife, a stationery stapler,
- And most importantly - candy.
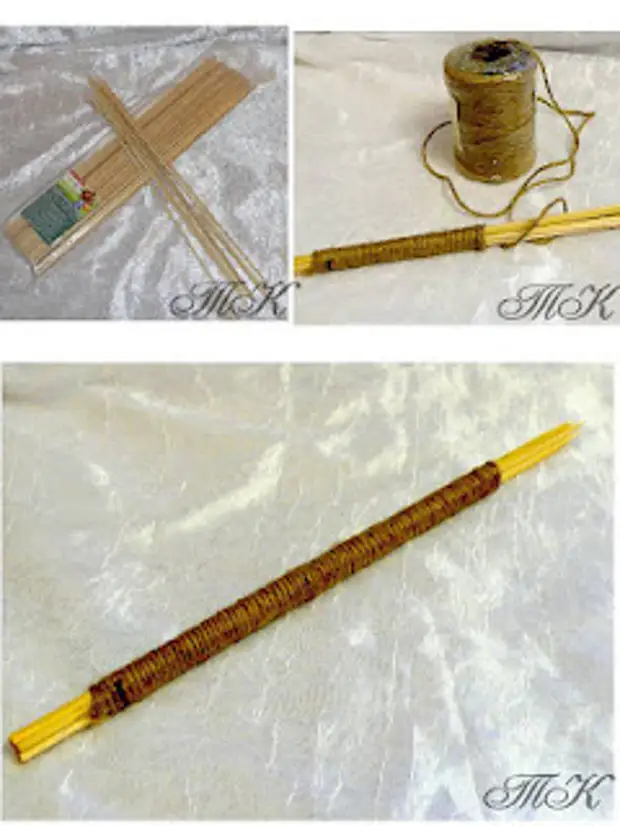
1. Making Topiaria I always start with the preparation of the trunk. Since I did not have a suitable stick, I had to do the trunk. I used wooden wands for kebabs. Inhabiting a bunch of sticks. For the required thickness, I needed 8 pieces. We glue the tip of the twine (or ribbons - someone like it) on one side of the sticks and begin to wielding sticks, at the end of the tip also fasten with hot glue.
2. Make a ball base for flowers. To do this, from the bar of the floral oasis, cut off a piece of the required quoted kitchen knife. Insert the trunk to the oasis - we obtained the basis for colors.
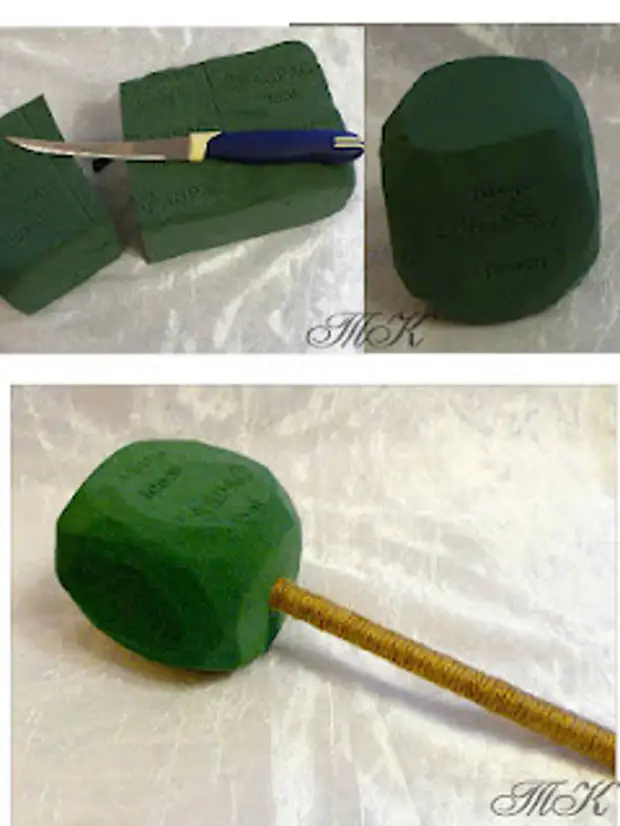
3. Fix the basis for colors in the vessel. Insert the trunk to the prepared vessel and fix the foam. We divorce alabaster for fill. Pour the solution into the vessel and spill the top. We assume the prepared framework for Topiaria for drying.

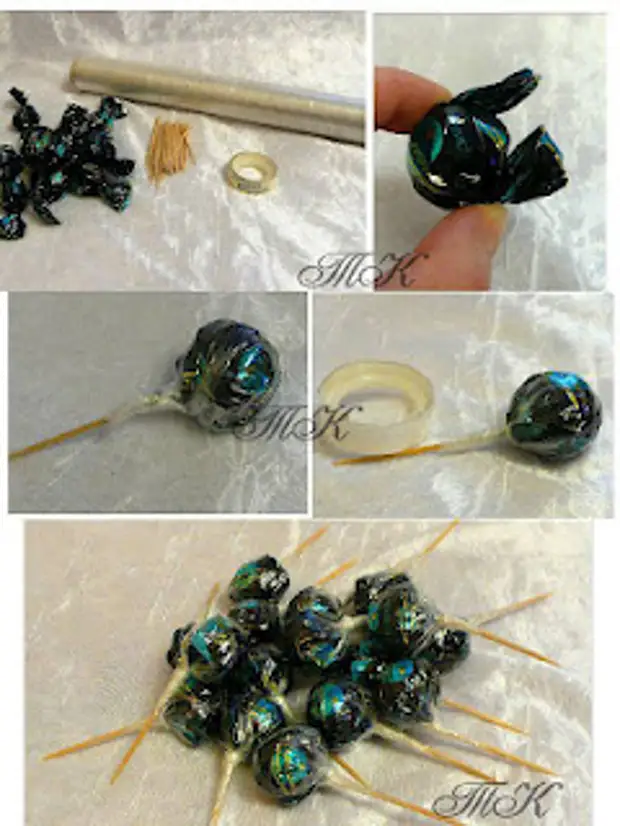
4. We will deal with the preparation of candy. Cut off the square from the film (I made a break in advance in the middle of the film in a knife in a circle, so I was overwhelmed only from the "half of the roll), at the candy caution tails and put a round of the square from the film," wrapping "a film with a film. We tying the collected film to the toothpick and fasten the scotch. We prepare the required amount of candy.
5. Making cups. We cut off from the roll of the corrugated paper of the green color with a strip 5-6 cm wide. The strip is cut into squares 1.3 fission height (about 6 cm). On the one hand cut the cloves. Spin the tips of the teeth.
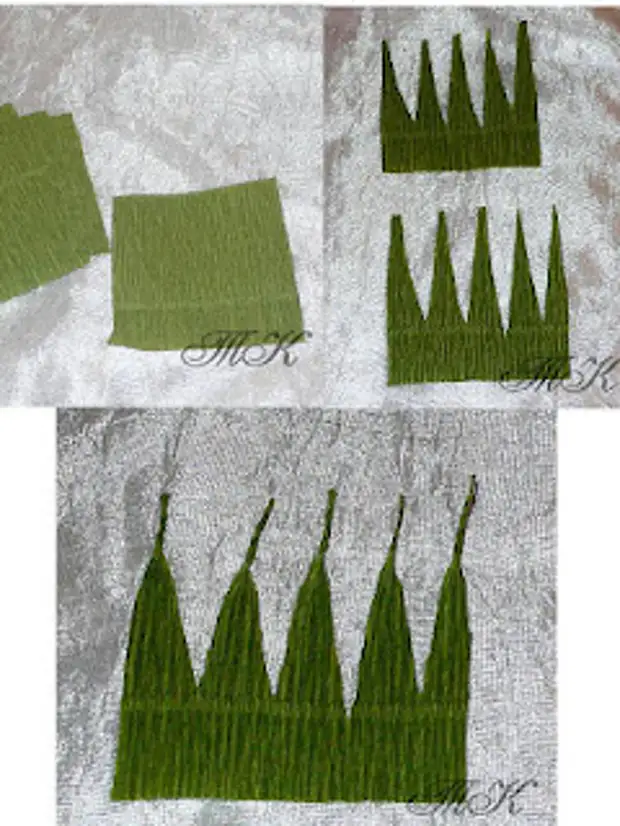
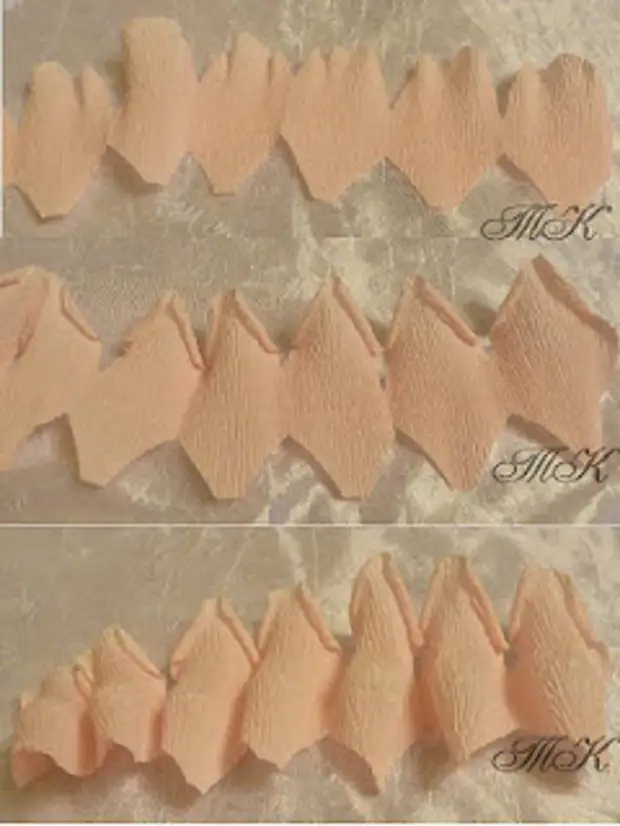
6. Cut the rose petals. You can make petals separately, in this Topiaria I made a ribbon from petals. From the roll roll, we cut a piece of 35 cm. The sliced piece is cut into strips of 1.5 division (about 7 cm). Each strip we fold the harmonic width of 5 cm. It will turn out 7 additions. From above, we cut a semicircle corner from above, and below - just cut off the corners in a straight line. Received petal. The middle of our harmonica is not cut.

7. Give the petals form. We deploy a ribbon with petals and slightly stretch each petal at the top edge. We take toothpick (or rod) and twist each petal outward from both sides. From the inside, in the middle of each petal with thumbs pull out a small deepening for candy.
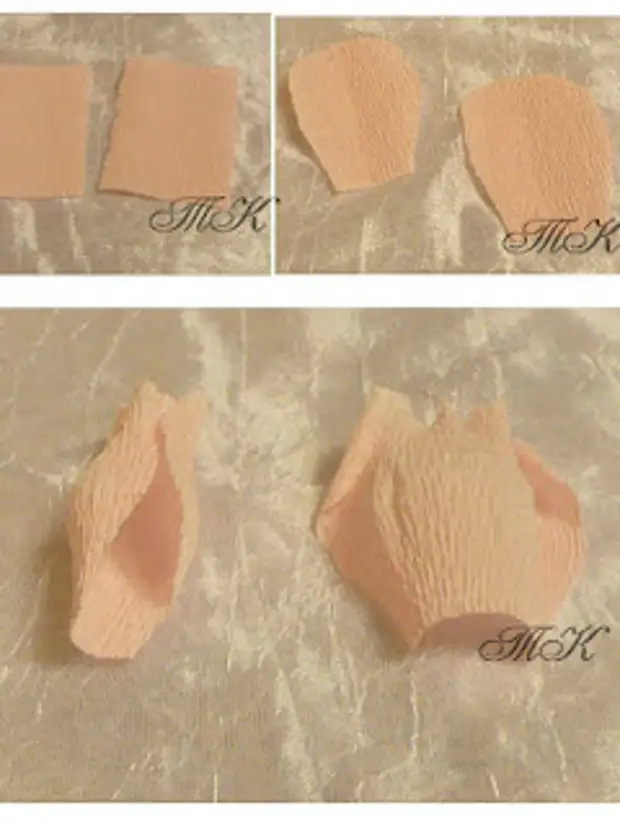
8. We make petals for the middle of the rose. Cut from the roll of paper striped 6 cm. From the strips cut off 2 rectangles with a height of 1.5 divisions. By analogy with a step 6. We curl the corners from above and cut off the corner from the bottom of the petal (but we cut a triangle from the bottom than step 6.). Lightly stretch the top of the petals. Pull the middle - deepening for candy. On one petal (it will be the petal number two) to the outside slightly tighten the edges of the petal.
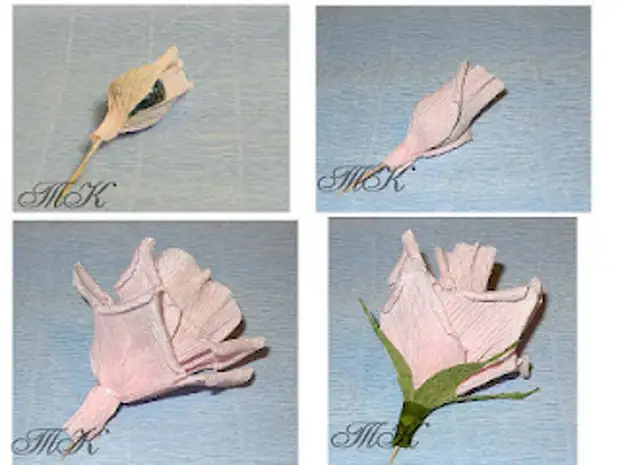
9. We collect a rose. Candy on the toothpick insert into the deepening of the first petal. From the opposite side we impose a petal number two. For fastening, use a small droplet of hot glue. They got a bouton. We take a ribbon from the petals and wind around the bud, forming a rose, while holding the petals of hot glue from time to time. In order not to be unnecessary thickening at the base of the flower, I try to use glue as much as possible, and so that the flower does not fall apart. Be sure to flush the base with a thread. After the base of the base, I cut off the "corner" receding from the toothpicks of surplus corrugations. We take a prepared cup and glue around the base, if necessary, slightly stretching .Things. Thrust grind the base, closing the cutting of paper. Rose is ready. We make the required number of flowers.
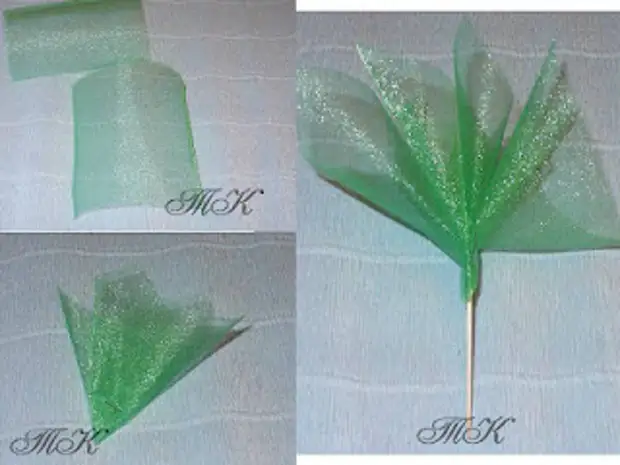
10. We make pounders from organza. Cut from the organza squares. The size depends on your idea and the size of the produced roses. I cut out the squares of 12x12 cm. Each square is folded diagonally and slightly displacing so that the angles do not coincide. The resulting potted triangle we fold into the pounding of the harmonica in 3 additions. At the base with the stapler. On the toothpick with hot glue glue 2 pounds, placing toothpick inside. We prepare more such panties.
11. We collect Topiari. While we made roses and pounding our foundation completely froze. You can collect topiary. We start sticking to the oasis of roses, trying to give the shape of the ball. I picked roses not very tight to leave a place for greenery.
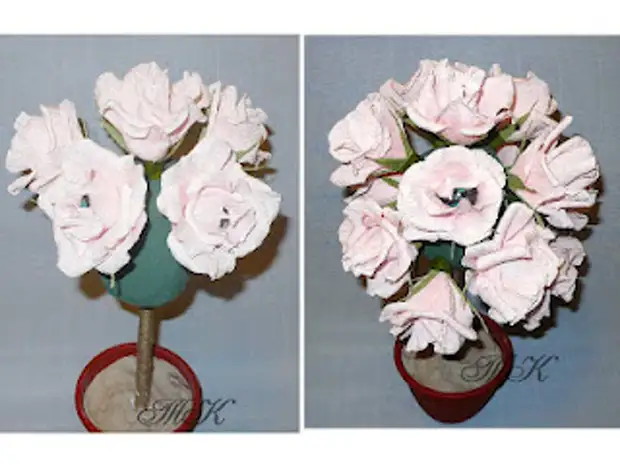
12. Decorating the topiary. Between roses sticking and oasis green functions, closing all empty places. The base is closed with a green organosis. We decorate beads, butterflies, etc. admire the result.

I will be very glad if my master class helped you in creating a sweet Topiaria. Board what happened to you.
Source http://skrattt.blogspot.com/2012/04/blog-post.html and http://yarhobby.blogspot.com/2012/04/blog-post_04.html