

In this master class, I will tell you how I make small beads with a carving in the form of a flower and toning.
Main materials: Baked polymer clay of bright shades; dry pastel contrasting color; Gel (liquid polymer clay).
Basic tools: sharp knife; Schtihel with V-shaped blade for minor work.
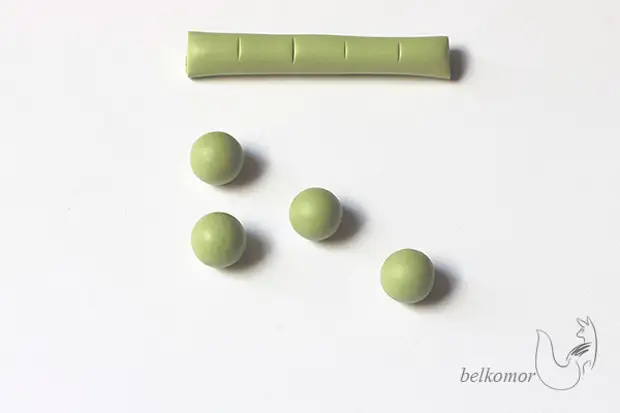
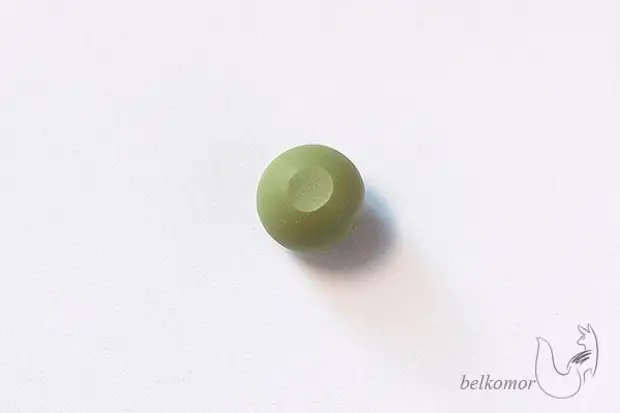
1. Production of beads
The carving is made on fully finished beads that have stayed in the stove of the amount of time.
I squeezed the sausage of plastics using the ruler, cut and rolls the small identical beads with a diameter of a little less than 1 cm.
The plastic needs to be very well, so that there are no large bubbles and cracks in beads, which are found during thread and spoil appearance. At the same time worry about the smoothness of the surface and impeccable purity - it is not so necessary.
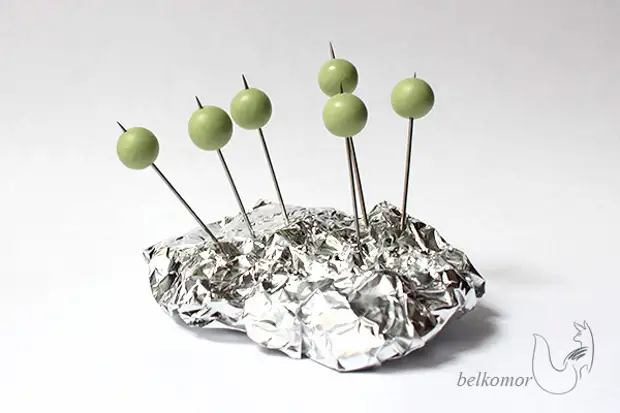
After the balls were leaning a little and harded, I made a hole in them with needles and stuck beads into the crumpled foil. It's time to bake!
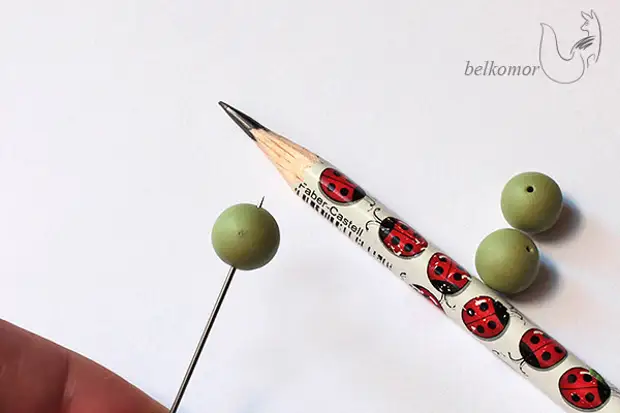
2. Marking
After baking, I take a pencil and find the center of the future flower on both sides of the beads - they will be bilateral.
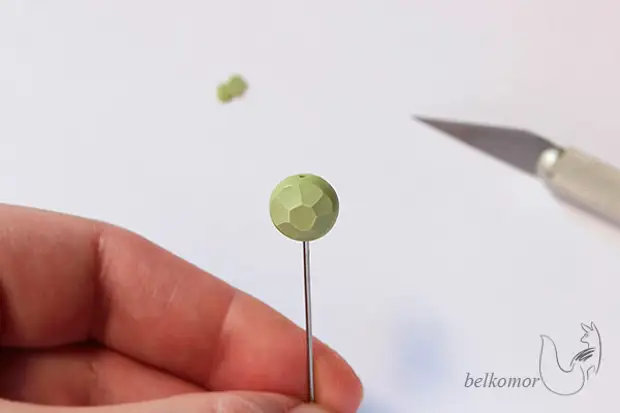
3. Carving a knife
I use sharp knives with a triangular shape of the cutter. They are comfortable to cut, holding the whole palm and directing the cutter to himself. After the cut, the knife rests on the thumb. The slice itself is obtained in the form of a well or a flat mug.
Hands position when carving:
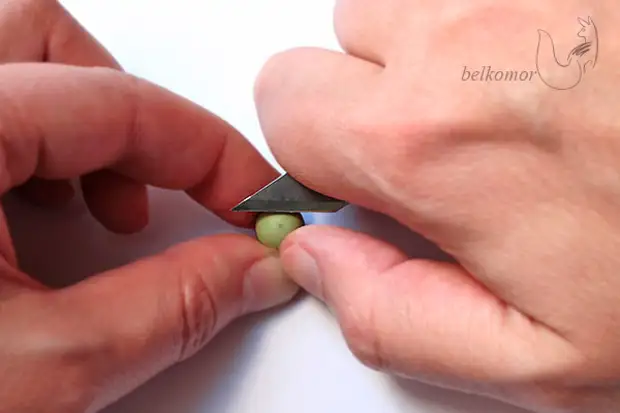
Focusing on the markup, first cut the middle of the flower, on both sides of the beads.
Then in a circle in the direction of the center, I make sections of "petals". Bead is rotated in the fingers. Sections do not necessarily have flawlessly smooth and rhythmicly located - later grinding will change their contours.

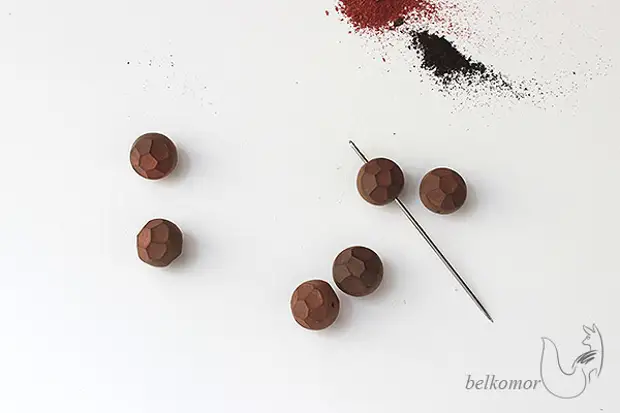
4. Toning
Grinding pastels of one or more close colors and rub's fingers into sections. It is necessary that each slice is evenly painted well, and not just fell in pastel. At the end of this stage, you need to wash your hands.
5. Grinding
At this stage, sometimes I put on a bead on a needle or something else, which will allow it not to touch once again. Grinding one of the sowing sponges from the Micro Mesh set, but you can use any sandy paper with small grain.
Marking of my sponge - 1500 (that is, in the set it is the most rude). After work, it will need to wash with water from pastels and dry.
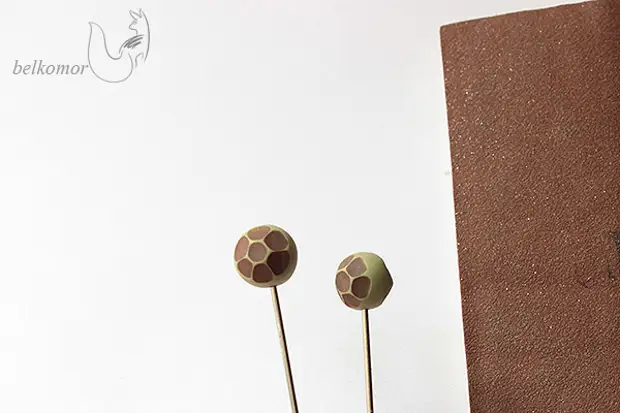
Work at this stage is like erasing of excess pastels from the sides and grinding the contours of the flower in order to make them noticeable. I act like this: first paint is erased from large surfaces on the sides - circular motions, then you need to spend the sponge several times on the flower. The contours of the sections are brighten and curly.
6. Fastening tinting gel (baking)
I take a fresh gel (not thickened, flowing) and dragging the painted sections with your finger. Pastel is smeared with these actions, but not very much. It is important to trace so that the gel gets everywhere where there is paint, and his layer was minimal.
After waving, take a paper napkin and wipe the unpainted areas and miss the painted if the gel accumulation turned out there. The thick layer of the gel under the baking will slide down and turn into drops - the bead will be corrupted. In addition, at the stage of creating streaks, the surplus gel can also interfere.
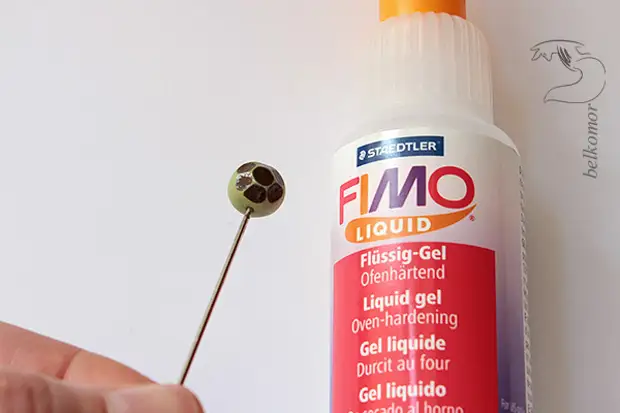
After the work is completed, re-banging beads and cool them. After that, they become resistant to water, and it will be impossible to accidentally complate paint with them.
7. Stop
Beads are ready, but you can add details to the resulting pattern. These will be accommodation on petals. I make them a shyhel for small woodwork with a V-shaped blade. It is necessary to cut off shagon and aiming well. Movement comes from the center to the outer edge of the petal.
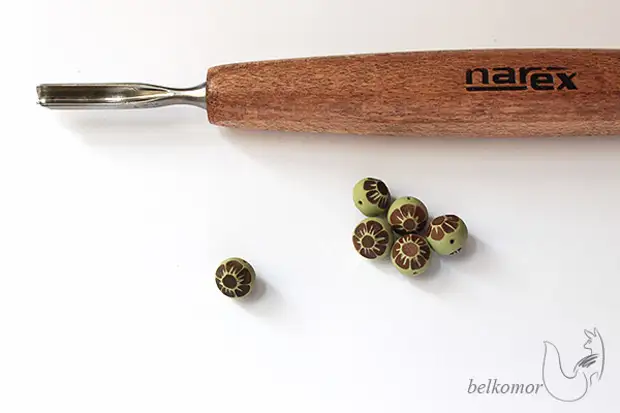
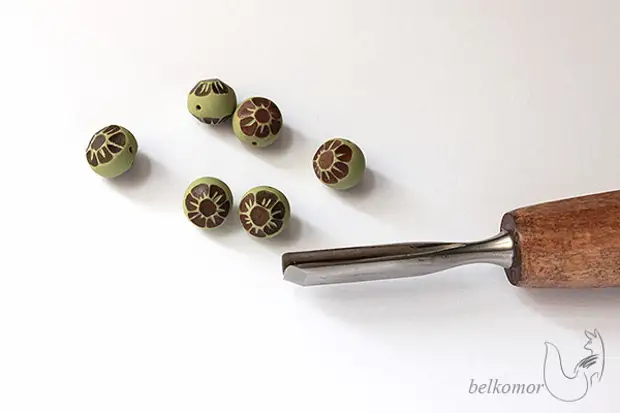
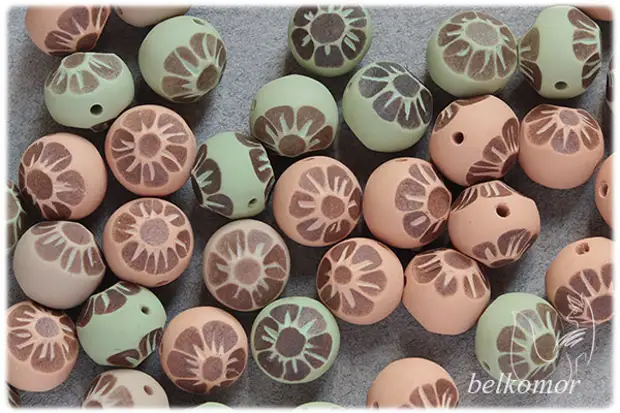
On this work is completed, and beads can be used in decorations!
A source