

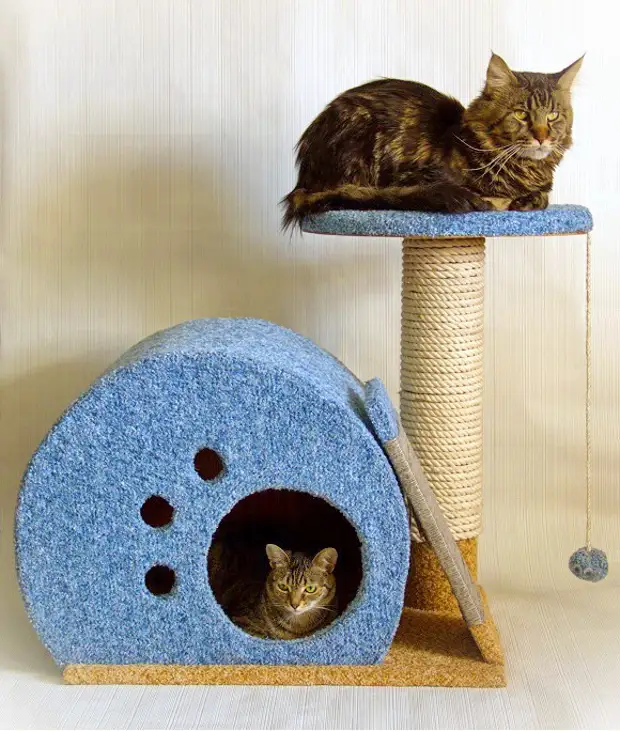
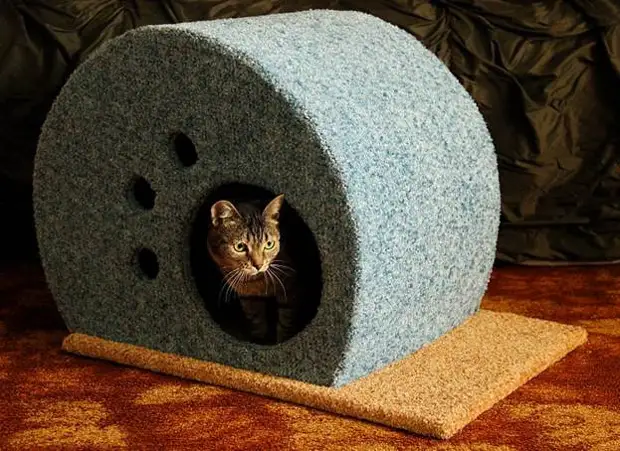
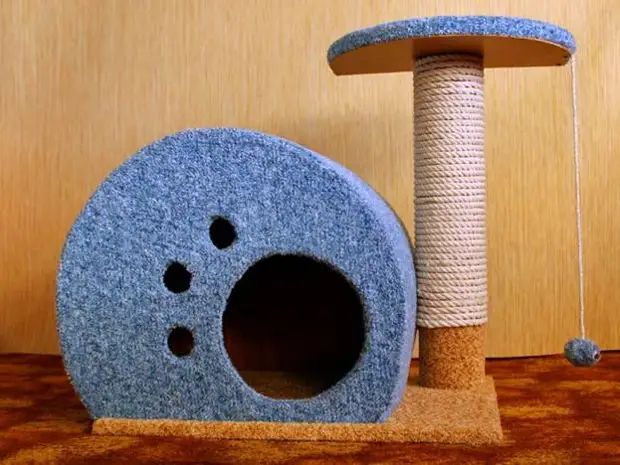
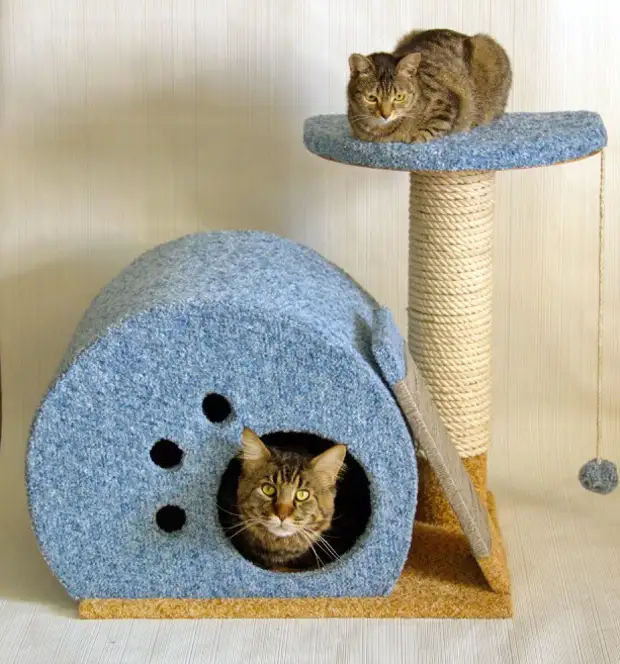
In this article we will tell you how to make a mini-complex for the cat: a house with two claws, a bed and a toy. Such a complex is well suitable for both an adult cat and a kitten or cats with kittens. The house will be quite spacious for a large cat or cat-mothers with children, and the inclined bracket will allow kittens to climb up and learn to sharpen claws in a specially reserved place, and not about home furniture.
Making Furniture for Cats: Materials
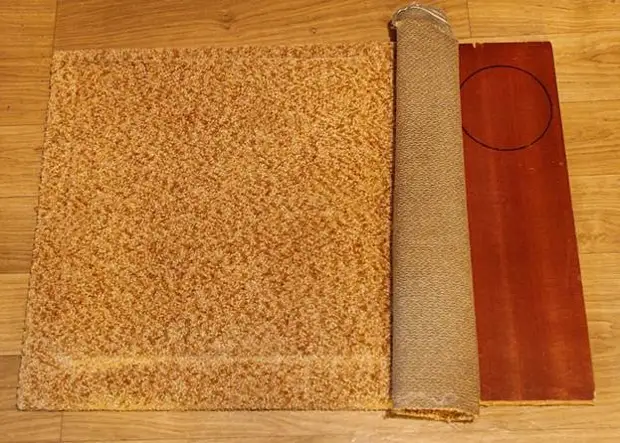
- Rectangle from chipboard or other solid wood material (will serve as a base, size 44 × 61 cm)
- Two rectangles from chipboard or other solid wood material (of which we cut the walls, size 55 × 44 cm)
- Rectangle of fiberboard (40 × 122 cm)
- Rectangle from chipboard or other material (for laying, size 44 × 30 cm)
- Rectangle from fiberboard (for laying, size 44 × 30 cm)
- 7 wooden plates (will be spacers for walls, 3 × 4x37cm)
- Solid material pipe (diameter 110 mm, length 60 cm)
- Two wooden bars to strengthen the pipe
- Rope for vertical brackets (x / b, sisali, jut; ropes with a diameter of 11 mm will be required about 15 m)
- Thin board for inclined brates (18 × 41 cm)
- Thin rope or strong fabric for inclined brates
- Adhesive for thermopystole
- Selfless
- Porolon (two rectangles: 44 × 30 and 33.5 × 36.5 cm)
- Artificial fur or furniture fabric with cut pile (2.2 sq.m.)
- Toy on rope
Production of furniture for cats: Tools
- saw
- Lobzik
- Screwdriver
- drill
- Adhesive thermopystole
- Furniture stapler
- scissors
- roulette
- compass
- stationery knife
- sandpaper
- pencil, marker, chalk
Production of a mini complex for cats
Let's start with drinking from the chipboard and the Fiberboard rectangles of the desired size. The list of materials are given the size of parts for the manufacture of a house suitable even for a large cat. It is suitable and a small cat, but if you want to save a little on the materials, change the dimensions accordingly.
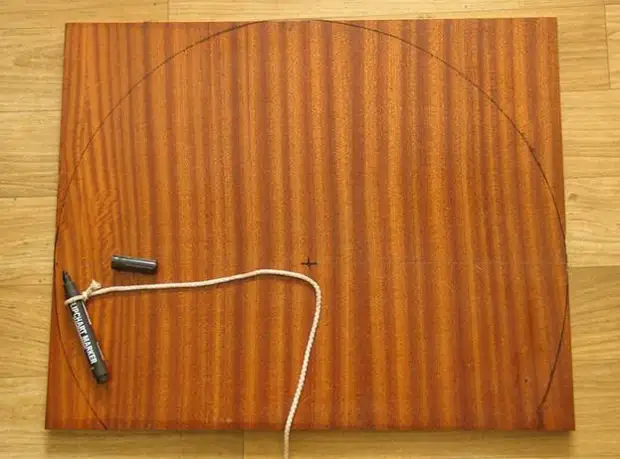
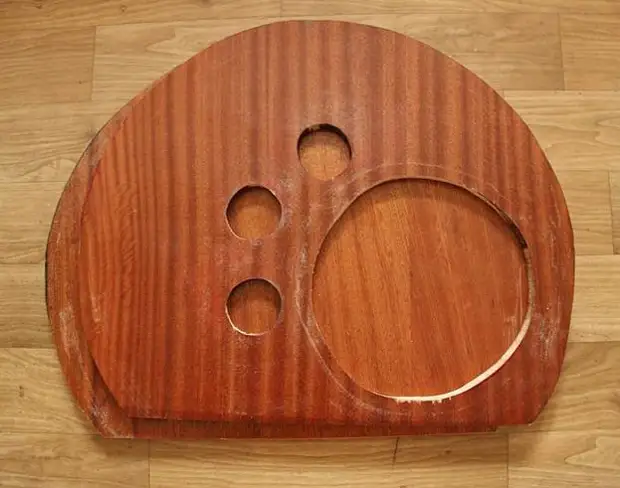
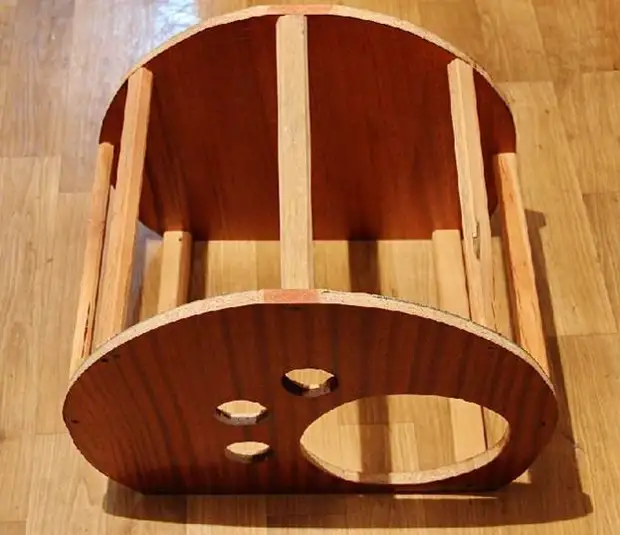
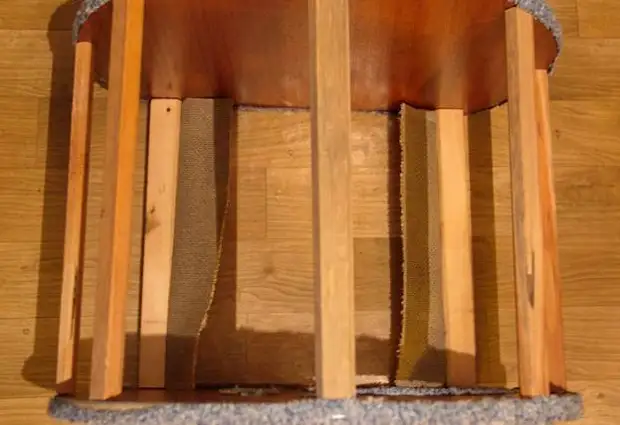
From the rectangles, allocated on the walls, drink truncated circles with a radius of 27 cm. First draw the figures that we will cut down. If you do not have a large circulation, tie a marker or pencil to the rope, measure the distance corresponding to the required radius, press the rope in the center of the alleged circle and draw this circle by pulling the rope.
The rear wall will be solid, and for it we simply draw one truncated circle.
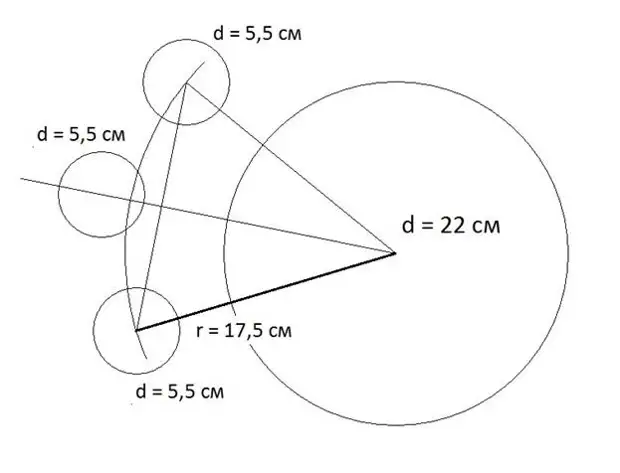
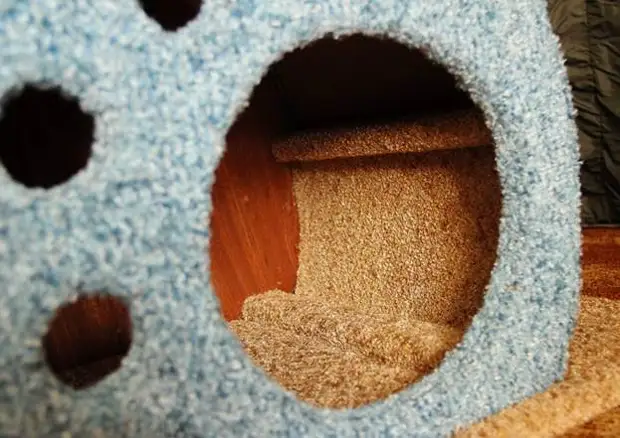
At the right-long quarter of the front wall, draw a circle that will serve as an entrance to the house. In our example, the diameter of this circle is 22 cm. We draw 3 circles with a diameter of 5.5 cm to obtain the imitation of the trace of the feline foot.
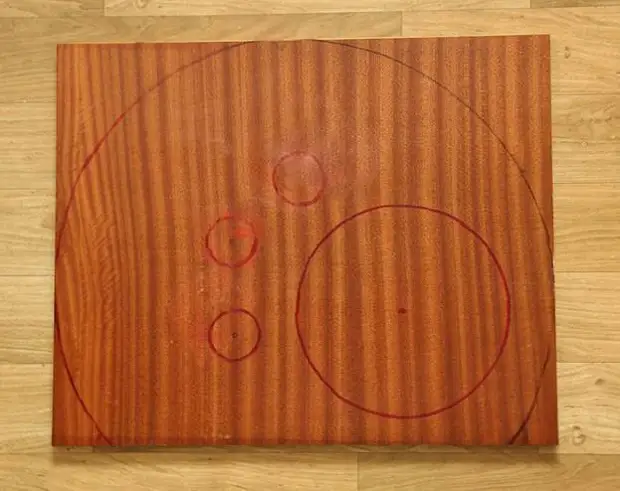
The extreme circles are located at the same distance (17.5 cm) from the center of the large circle, the middle circle is a little further (19 cm). The figure below shows the circle drawing diagram.
Drink hole holes. Small circles can be filled with drills and drilling crowns, if you have such.
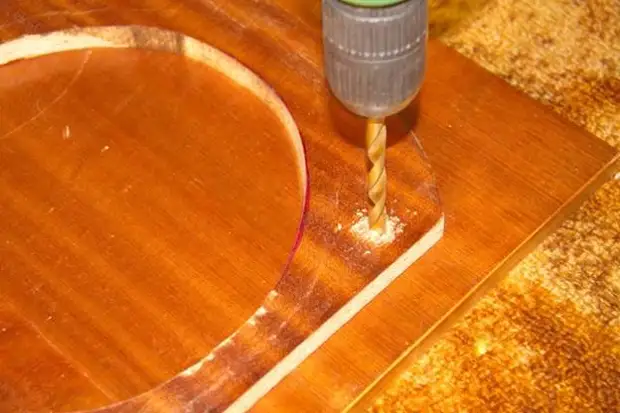
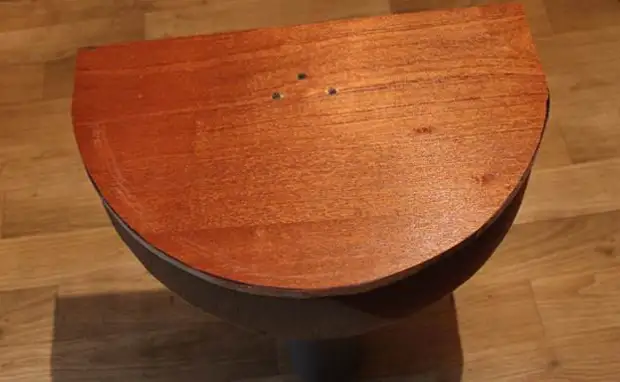
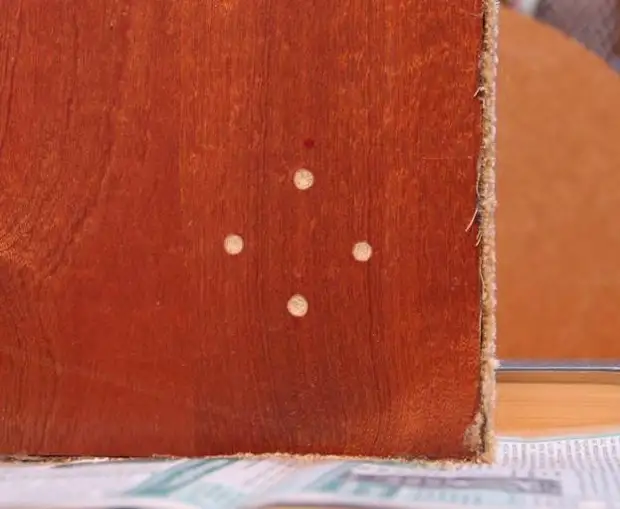
We put our truncated circles on each other so that they lay exactly one over the other. We celebrate seven points in which the walls will be fastened by the rails. To make it easy to find these points on both walls, drill a thin drill hole through both walls. You can simply screw and unscrew the screws.
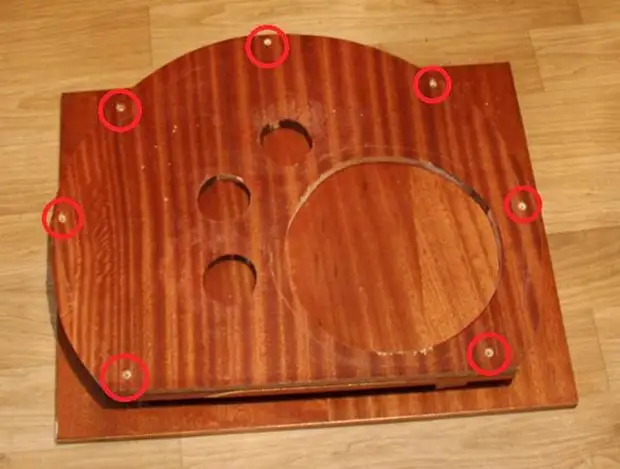
On both walls from the outside at the points of attachment to the rails (where we just drilled through holes) drill a small deepening under the self-tapping screw, so that they did not perform the plane of the walls.
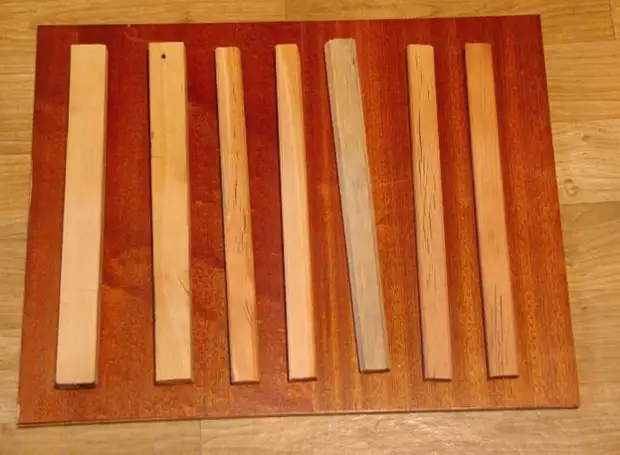
We cut off the 7 rectangular sections, we grind them and put the edges so that there was nothing sharp. The two lower rails may be thicker than the rest.
We fasten the walls with the help of rails and screws.
Cut from the fabric two blanks for the walls. You can simply break the walls, leaving a place on the allowance. The fabric should be with a cut pile so that the cat does not put the tighses and damaged claws, clinging. We took the fabric "Modena".

We glue the cloth to the walls. It is important to use glue without a sharp smell. A sharp unpleasant smell can scare the cat. We use a glue thermopystole and the corresponding glue.
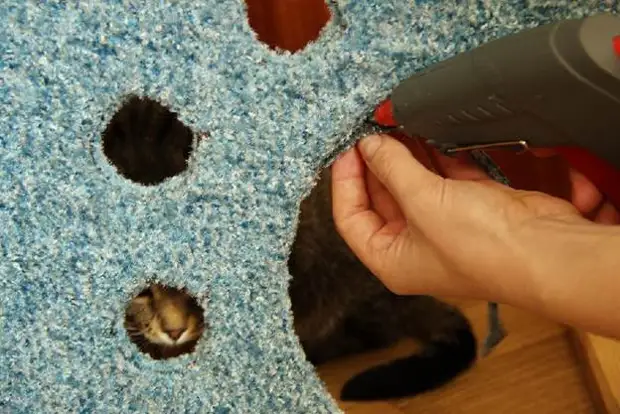
On the front wall we cut the cloth on the round holes, cut down too much and glue the edges. Top of the edge is sick another strip of fabric so that they look carefully.
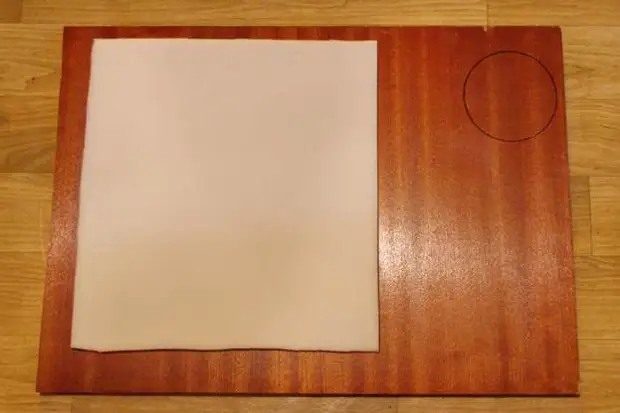
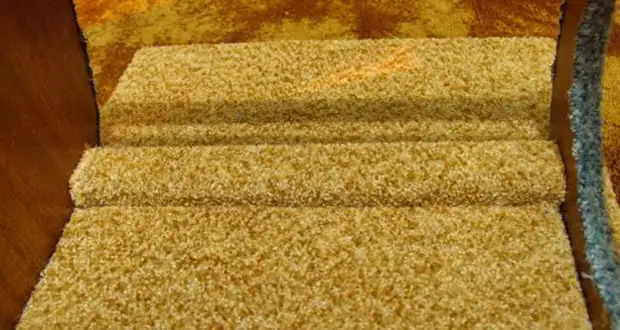
We put the house on the basis of the way it should stand. Between the two lower plates we will have a place under the bed, we measure it. Sut off the desired amount of foam rubber and glue to the place of the bed. (We marked the place in which the pipe will be attached.)
Purchase the base with a cloth. We used the blue cloth for the walls and light brown for the base.
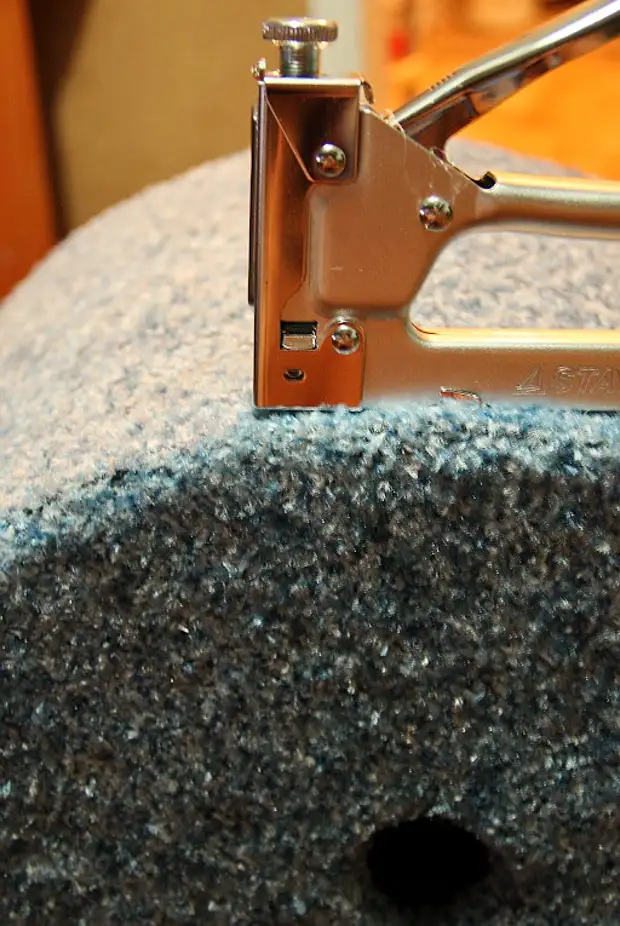
For a stronger fixation, you can attach a fabric on the sides of the furniture stapler. If the fabric is sat down at the edges, cut it into account and close the LED sheet.
Purchase the Fiberboard sheet cloth, which will be the roof of the house.
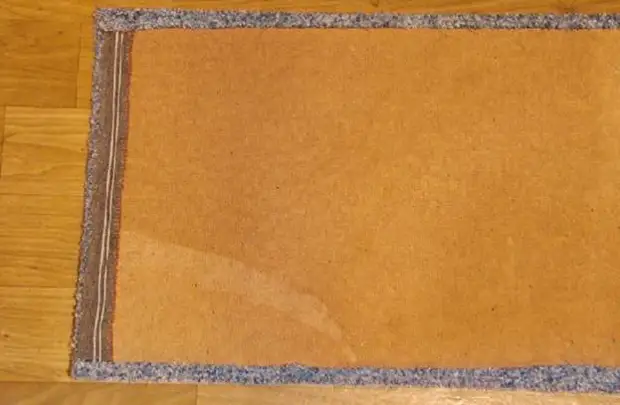
Of the same fabric, which is placed the base, cut out two pieces that close the lower rails, fastening the walls. We glue this fabric to the inner fins of the lower plates.
We put the house on the base and fasten with the help of self-tapping screws, pre-drumped the deepening so that the screws do not protrude. Pick the screws of such a length to securely attach a house, but do not drill the base through.
Fully glue with a cloth.
Attach the roof from the fiberboard to the house with a furniture stapler.
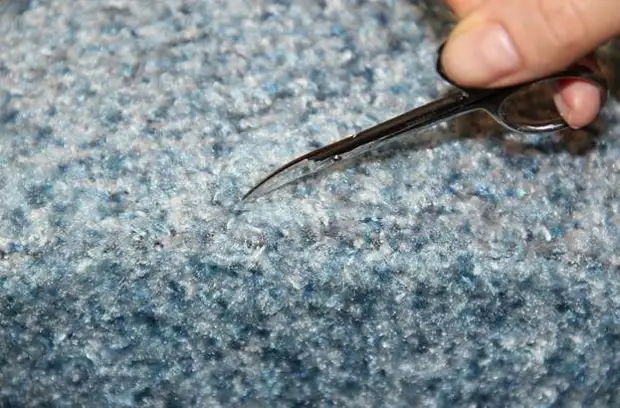
We spread the fabric under brackets so that they are not visible. It is convenient to make manicure scissors.
Inside the house we are glad to the cloth those places that can be seen outside.
The house is ready. It remains to add scheduling and laying.
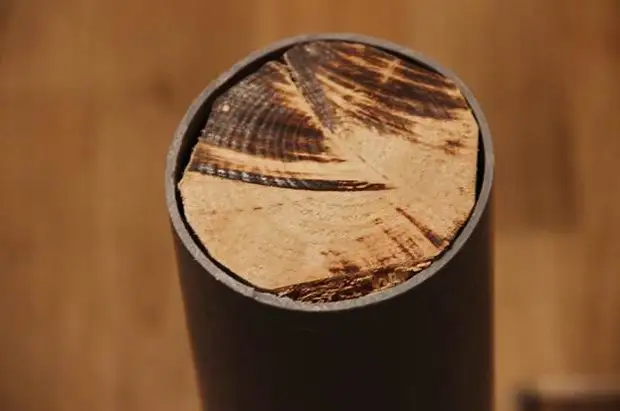
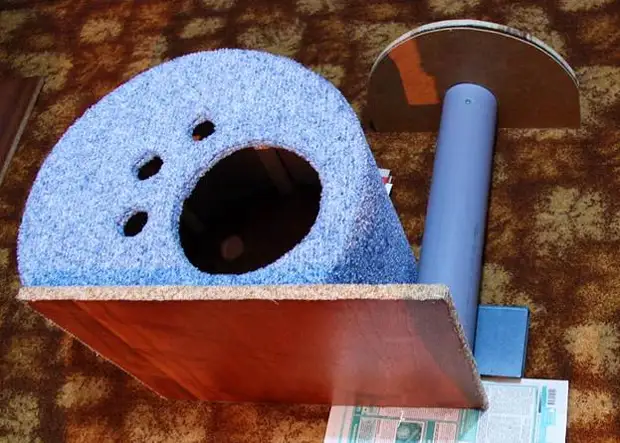
We take a plastic tube (diameter 11 cm, height 60 cm) and two bar for its strengthening. In order not to use metal corners for fastening the pipe, we cut out two cylindrical bars from a dry dust tree, tightly included in the pipe.
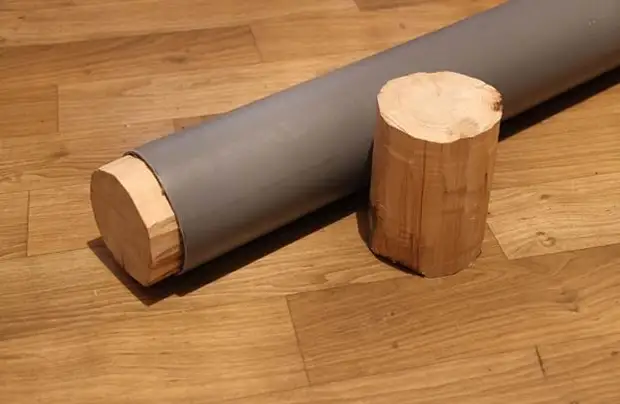
Insert the bars into the pipe and attach the screws.
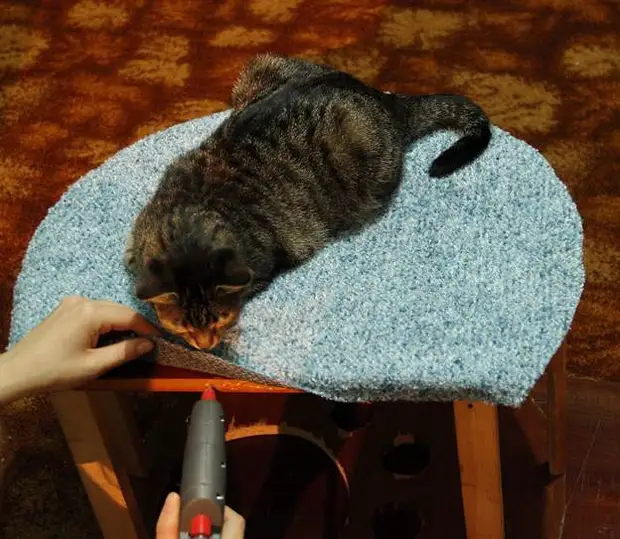
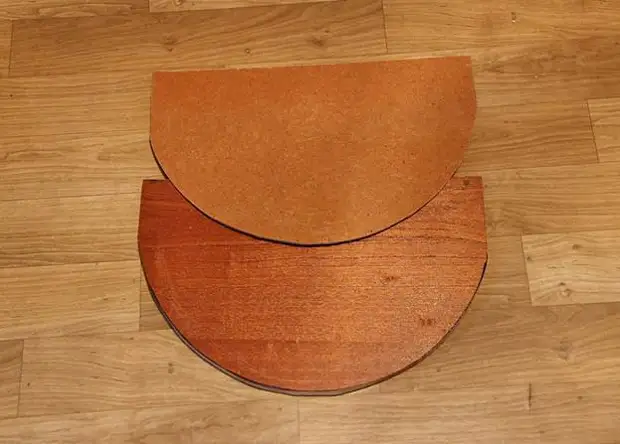
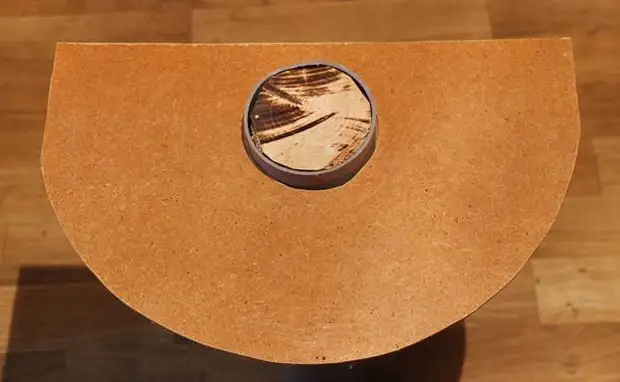
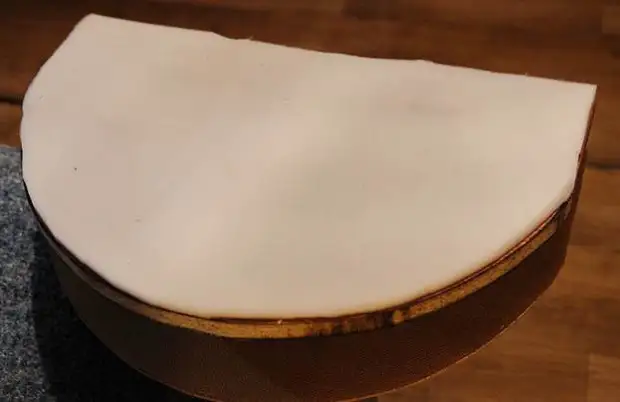
Cut from the chipboard semicircular foundation for a laying and the same fragment of the Fiberboard to close the glued fabric.
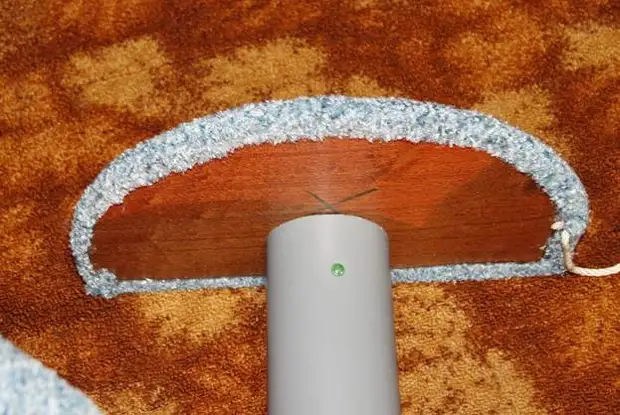
In the fiberboard, cut the circle under the pipe and wear fiberboard to the pipe.
We screw the lay to the bar inserted into the pipe. Do not forget to make deepening under the self-tapping screw.
We put a house on the back wall and substitute the pipe. In order for the house and the pipe lay parallel to the floor, put something appropriate thickness, for example, books.
We note the points in which the pipe will be screwed to the base, drill the recess under the self-tapping screw and fasten. We screwed up the design with four self-sustainability.
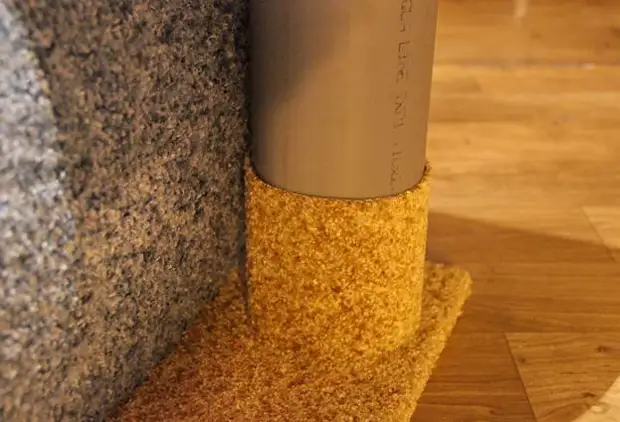
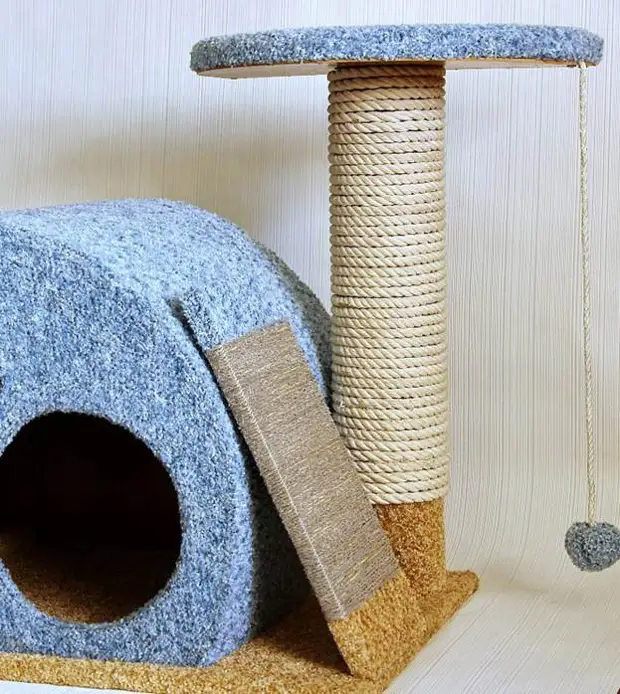
We glue the tide the bottom of the pipe. Watch this part of an expensive rope does not make sense - the cat will still not sharpen claws so low, but for kittens there will be a sloping bracket.
We glue the foam rubber to the layer.
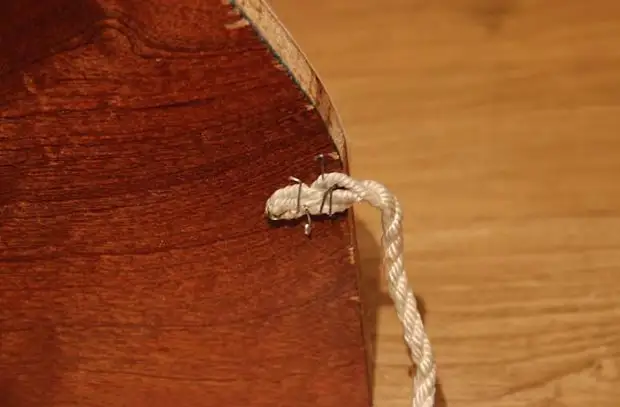
Furniture staples attach a rope for a toy to a layer. Staples should pass through the rope, otherwise the cat will pull it over time, playing. To the second end of the rope we glue or tie a toy.
We glue a laying cloth. For strength, we attach cloth from bottom to the stapler. If the brackets are not fully entered, carefully, so as not to break the design, scoring them with a hammer.
We glue the fiberboard to the bottom of the laying and wind the pipe with a rope. The first and last 2-3 turns of the rope are gluitive that the rope does not work out.
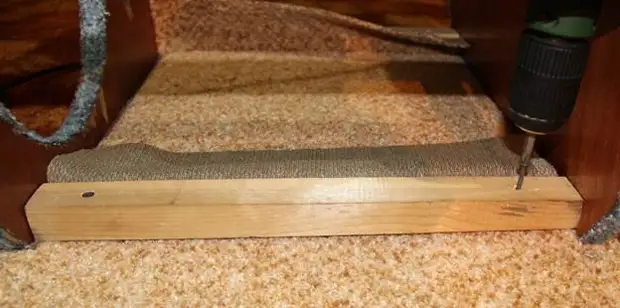
It remains to attach an inclined bracelet. The bottom edge of the boards is shy at an angle of 45˚ so that the board fits tightly to the base. The ends of the board are gluable cloth. Top and bottom We pasted with a cloth of different colors, in accordance with the color of the house and base.

The board can be wrapped with a thin rope or enclose a strong cloth, which the cat can accumulate claws. We screw the board to the base and to one of the rails, fastening the walls. If the rope is used, then push the rope and screw the board between the turns. If the board is placed with a cloth, we make cuts in the tissue, screw the board, closing the cuts and put them on.
Our mini complex is ready.
A source