
An ordinary LED flashlight is easy to turn into ultraviolet. Such a thing is useful in the farm and will help to see the invisible.
Even such a perfect optical device, like a human eye, is able to see only a small area of a wide range of electromagnetic emissions. But despite this, the person could not only open and explore almost all types of radiation, but also to use. For example, ultraviolet radiation.
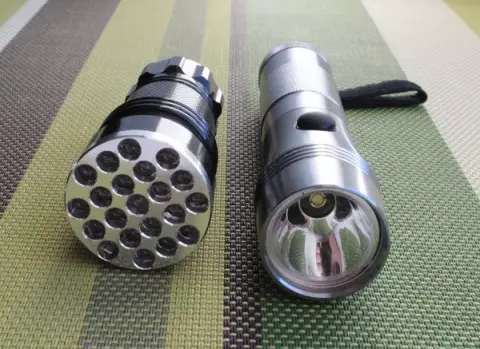
Fig.1
Ultraviolet radiation (often called it just ultraviolet) is an electromagnetic radiation that occupies the spectral range between the purple region of the visible spectrum of light and X-ray radiation. It was open more than two hundred years ago. In 1801, the German physicist Johann Wilhelm Ritter began searching for radiation outside the purple region of the visible spectrum. Soon, after a number of experiments with photodegradation of silver chloride, ultraviolet radiation was detected.
This radiation has many interesting properties. Perhaps the most famous is the ability to cause photoluminescence in some substances. Under the influence of ultraviolet rays, these substances begin to glow various colors of the visible spectrum. One of the first, this phenomenon found the famous American student-experimentator Robert Wood. In 1919, Robert Wood demonstrated by the experts of the Secret Bureau of the Laboratory of the main censor of the British Navy, which a number of substances glowing under the influence of UV rays can be used by spies and geasers in as invisible ink.
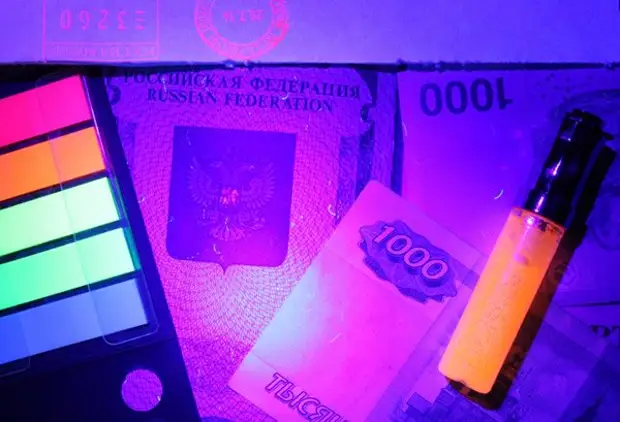
Currently, ultraviolet photoluminescence is widely used to protect important documents and banknotes from fakes, to identify traces of pollution, invisible in conventional light, in criminalistics, and a variety of other cases. Ultraviolet lanterns can be used in everyday life. With their help, it is easy to check suspicious banknotes to authenticate, reveal the oil leaks, antifreeze in the car, antifreeze, and other technical fluids (they are easily noticeable in ultraviolet rays). I use an ultraviolet flashlight during general cleaning in the kitchen, as even the most imperceptible drops of fat and oil become visible in ultraviolet light.
Unfortunately, not in every store you can find ultraviolet electrical lanterns. And those that are - or have completely small power, or are very expensive. But the powerful ultraviolet lantern is very easy to make from an ordinary inexpensive LED electric flashlight, replacing the visible light LEDs in it on UV LEDs.
How to make ultraviolet flashlight
Attention! Ultraviolet is dangerous for vision - in no case direct the ultraviolet flashlight in the eye.
1. Disassembly lantern
What is needed for that? First of all, the lantern itself. There are two types of small electrical lamps: with a plurality of low-power LEDs, or with one powerful LED. (Fig. 01)
Both lanterns were purchased at the nearest store at a price of up to 300 rubles. You can remake both types of lanterns. But it is much easier and easier to do it with a flashlight, in which one powerful LED. Choosing a flashlight, disassemble it. As a rule, all electrical lanterns arranged approximately equally, and consist of a housing in which the LED module, a mirror reflector, an end cover, and a power source are entered. In our case, this is a standard cassette for three EAA elements of 1.5 volts. The switch can be both in the lantern housing and in the end cover. (Fig. 02)
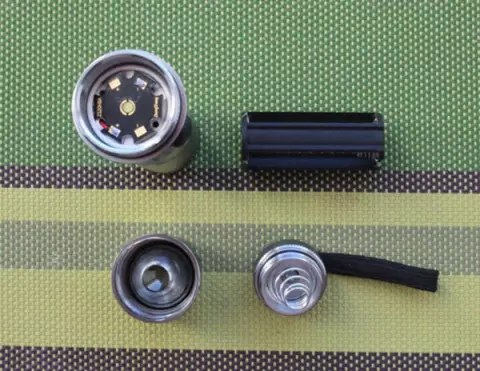
Fig.2
Remove the LED module from the case of the lamp. It is needed not only for directly fastening the LED, but also for removal from the excess heat LED during operation (and powerful LEDs are heated very much). We disassemble the module. (Fig. 03 -06)
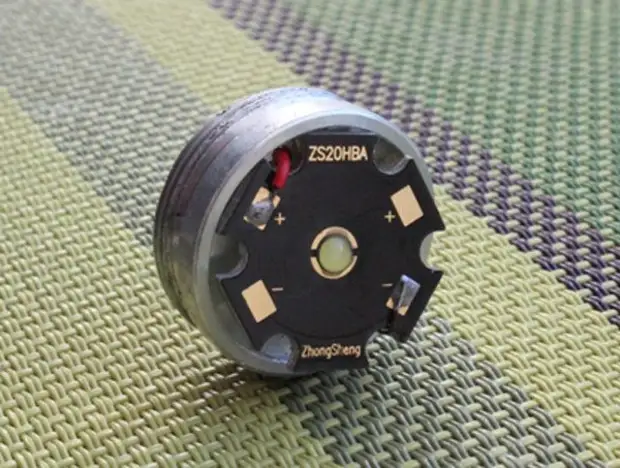
Fig. 3.
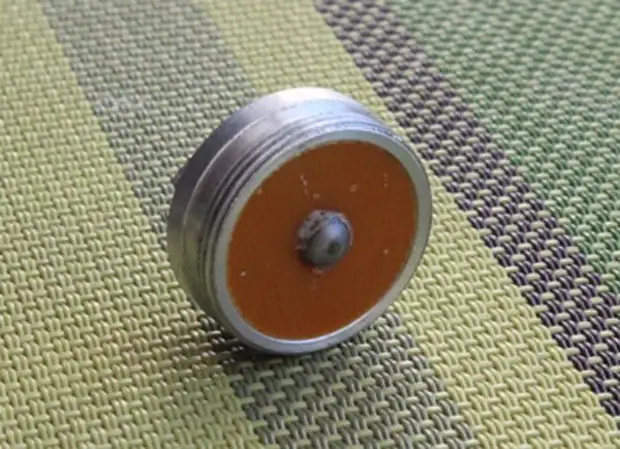
Fig.4
Fig.5
Fig.6.
Unfortunately, many manufacturers of inexpensive electrical lanterns are saved on small details, on materials and assembly quality. This flashlight is no exception. The LED is not fixed, although threaded holes for the screws are available. Causes a smile "minus" wire of the LED and its contact with the module housing. The manufacturer "forgot" and about the thermal path between the LED and the module, and therefore cannot be expecting a normal heat sink. But all this is easy to fix! The main thing in the flashlight LED has the standard size and shape of the "star".
2. Acquisition of the necessary components
The next step we buy a powerful ultraviolet LED. To save funds, an UV LED of the Unnamed Manufacturer was acquired, in size and form coinciding with the lantern installed.
There is a small subtlety. During operation, the LEDs are very sensitive to exceeding the permissible current. If this condition does not comply with the LED's lifespan, the LED will sharply decrease, or it will perpetrate at all. The easiest way to limit the strength of the current is to put a resistor with a LED sequentially (on what the lantern manufacturers also saved).
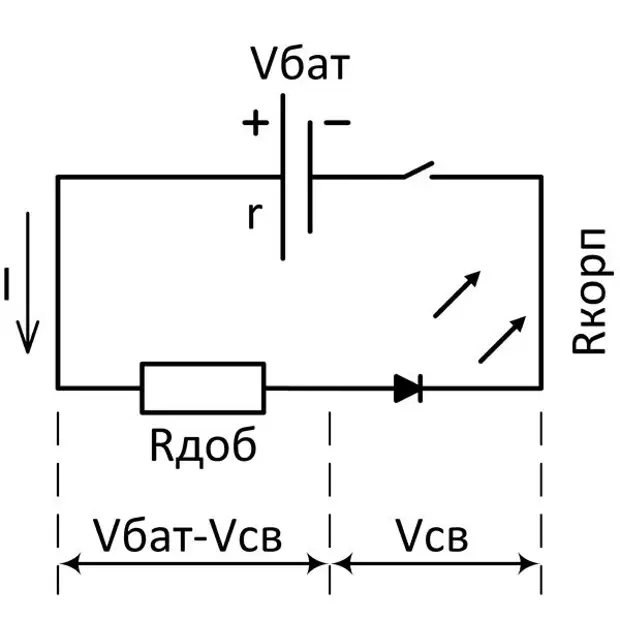
The calculation of the value of electrical resistance can be performed by the following formula (based on the well-known Ohm law):
R = (VBAT- VCV) / I
R = R + RBD + RDB
At the same time, VBAT is the power supply voltage. In our case, it is 4.5 volts (three elements of AAA 1.5 volts). VSV and I - voltage and current power required for normal operation of the LED. In our case - 3.6 volts and 0.7 amps. R is the resistance value required to limit the current. It consists of resistance to the addition resistor of the RDB, electrical resistance of connecting conductors (flashlight housings, switch, threaded connections) RCBP, and internal resistance of the power source R.
Substituting all the values, we obtain that R is approximately 1.3 ohms. This is a very small value, commensurate with the internal resistance of alkaline elements of AAA power (about 0.15 ohms for one element) and electrical resistance of the lantern housing. After such an exemplary assessment, a resistor was chosen by 0.22 Ohm with 1 watt power reserve. The LED and the resistor were bought at the nearest store of radiosters, only 150 rubles spent on it. During the calculation of additional resistance, the attentive reader probably noticed the main lack of current stabilization using a resistor - the dependence of the current force from the voltage and internal resistance of the power supply. So, as the batteries are discharged, the current force (which means that the brightness of the flashlight) will fall. And if you put batteries in the flashlight instead of batteries - then the strength of the current will increase, since the internal resistance of the batteries is much smaller. But, simplicity and the speaker cost of the resistor with more than all pay off. (Fig. 07)
Fig.7.
3. Refinement of the flashlight and work testing
Details bought, next? Further, we disappear the old LED from the "positive" wire and disassemble the LED module. To the "positive" wire we solder one conclusion of the resistor. To another output of the resistor, we solder a small piece of isolated stranded wire. To the contact site "-" of the LED sold out a piece of uninsulated stranded wire bent in the shape of a ring. (Fig. 08)
Fig.8.
After assembly, the resistor will be located inside the LED module. And that the conclusions of the resistor accidentally did not touch the module and did not block the electrical circuit, a small piece of a shrink tube was dressed on the body of the resistor. You can simply wind two or three turns tape. (Fig. 09)
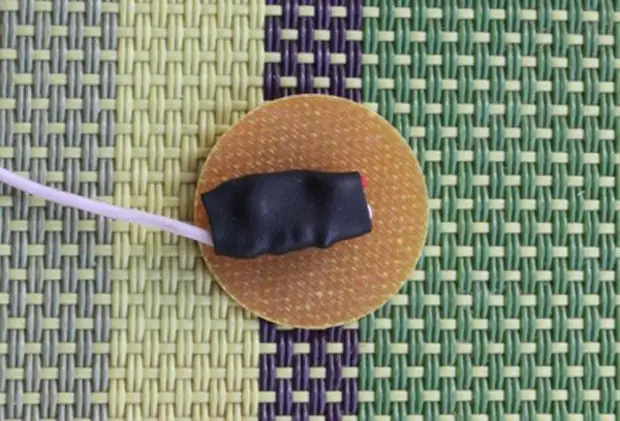
Fig.9.
Back collect the LED module, while the "plus" wire must pass through the corresponding hole in the module. (Fig. 10)
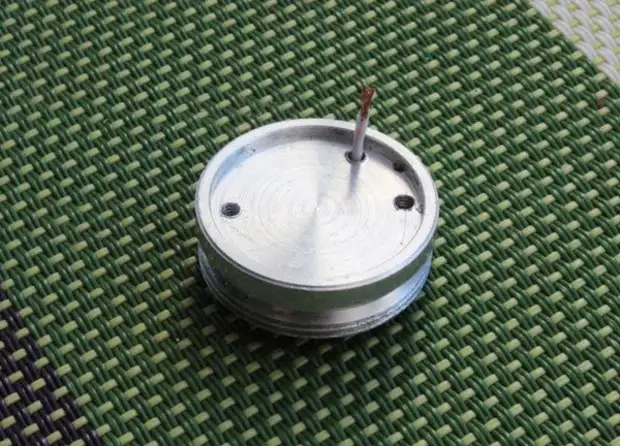
Fig.10.
For a reliable heat sink, we lubricate the Contact Platform of the LED Module with thermally sink, mounted the UV LED, fix it with two small screws (one of which passes through the ring of "minus" wire and closes this wire to the module body), we solder the "plus" wire to the site " + »LED. (Fig. 11,12)
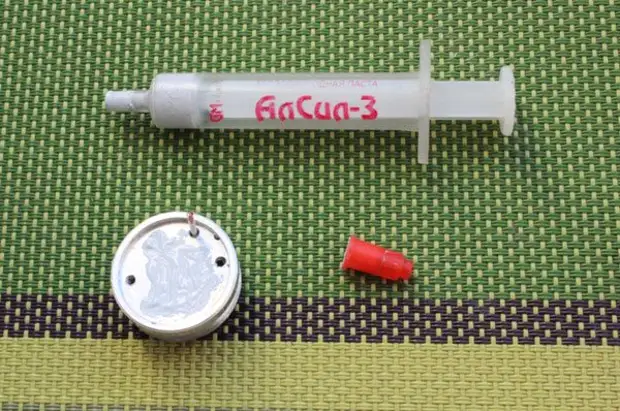
Fig.11
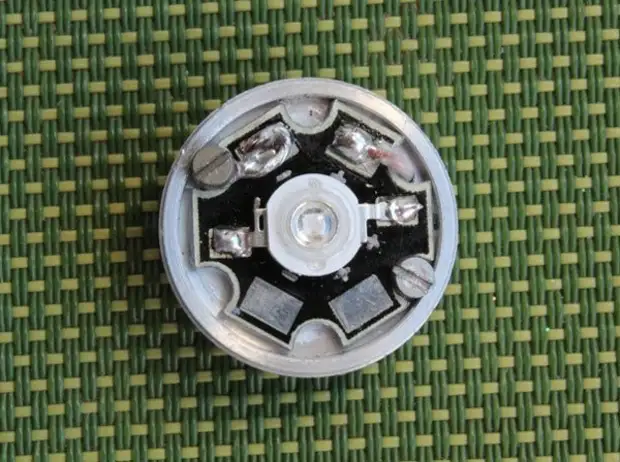
Fig.12.
There are two small subtleties:
- One of the screws at the same time is both a "minus" conductor. Therefore, when assembling, you need to carefully monitor that the thermal panel does not get into the hole for this screw. Otherwise, contact can deteriorate greatly or in general.
- During the assembly, you need to check whether the "+" shirts of the LEDs are not concerned. If they concern, it is necessary to put insulating pads from cardboard or plastic on top of the site.
Before the final assembly, you must check whether everything is proposed and how correctly the value of the additional resistance is selected. With the help of time wiring, we collect all the elements of the electrocups, while the battery pack is connected sequentially with a multimeter included in the current measurement mode. Everything works, the LED glows! (Fig. 13)
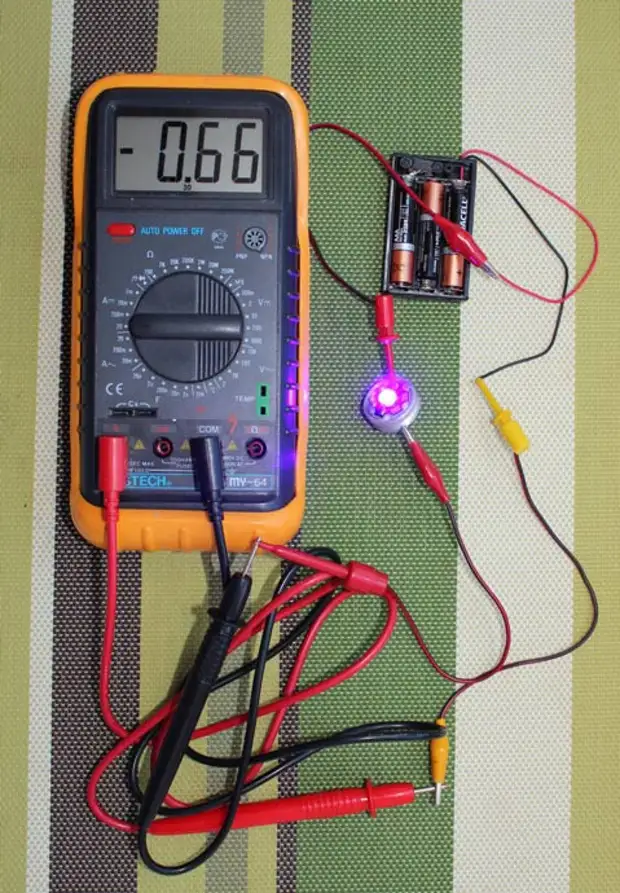
Fig.13.
As a result, the current consumed even less recommended value. In principle, it is not scary and even good. There is a small supply in case the flashlight will be installed batteries or accumulators with very low internal resistance. Additional resistance is chosen correctly.
Fully collect flashlight. That's all, alteration is completed. And the money was spent much less than when buying a finished flashlight. (Fig. 14)
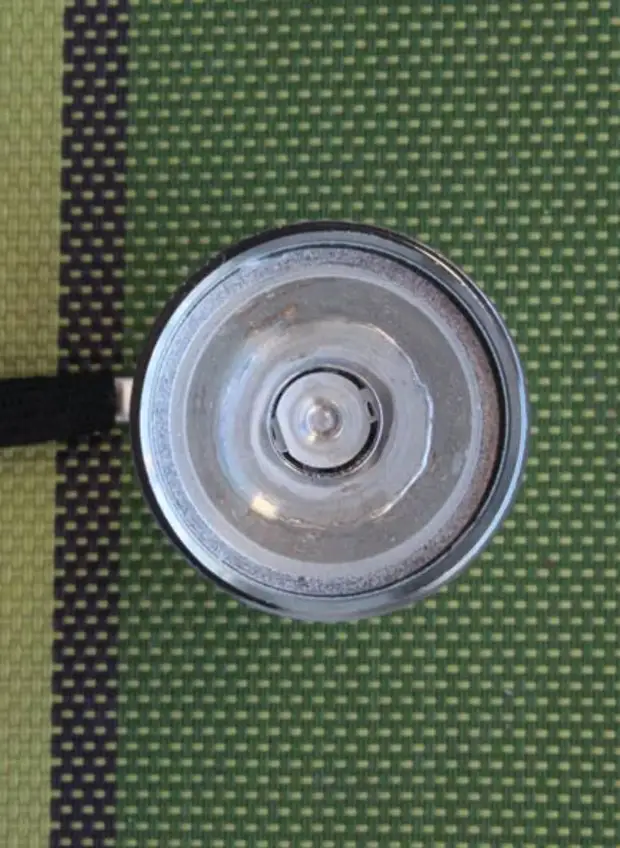
Fig.14.
Turn on the modified flashlight, preferably in a darkened room, and your apartment will open with a new, unexpected side! You will be surprised how many things around us painted with luminescent paints, dull and unpleasant in daylight, and bright and varicolored when exposed to ultraviolet. But, most importantly, do not forget about your vision and do not shine like a flashlight into my eyes or others.

Scheme
Photo by the author
Author: Oleg Mamaev
A source