
Last year, also did dandelions.
But they were with a truncle in the place of fittings and not enough shiny, in my opinion.
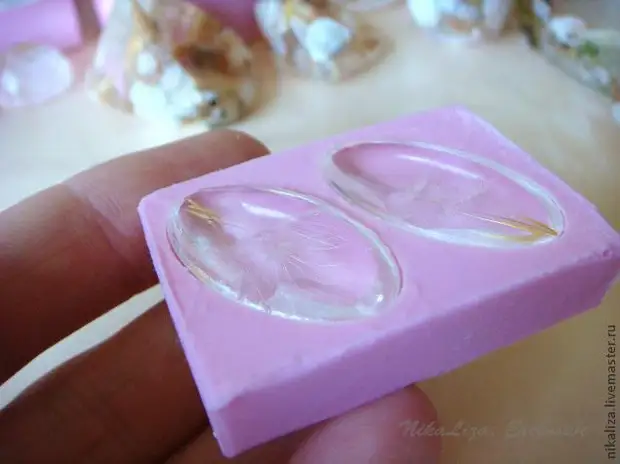
This year I found new moldes that allow you to make a sphere without truncation.
And this means that you can not hide the place of attachment under the big cap.
One pin is enough.
Pins also found new - from silver.
And the last friend.
I changed polishing pasta.
Now pendants are shine like a mirror))

A source
Hello! Today I will tell, and most importantly, I will show how I create my decorations with the help of epoxy resin and moldes.
For work is necessary:
- epoxy resin;
- silicone molds (for epoxy resin);
- disposable gloves, syringes, cups, stirring wand;
- various natural materials (drunks, shells, pebbles IT.D.);
- Pottal, stained glass paints, powder Pereple.
I work on the usual file so as not to swing the table.
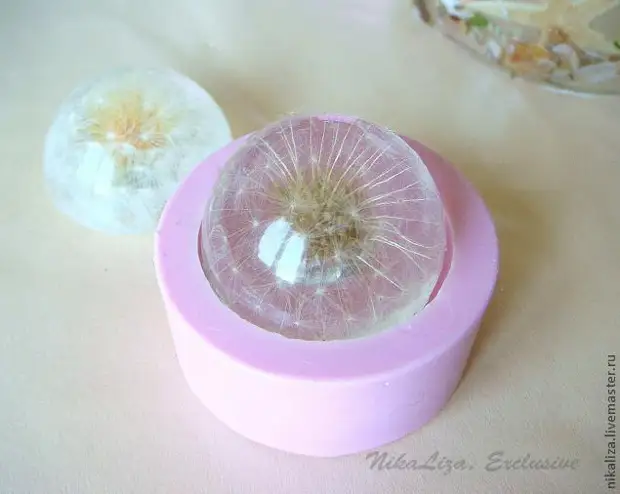
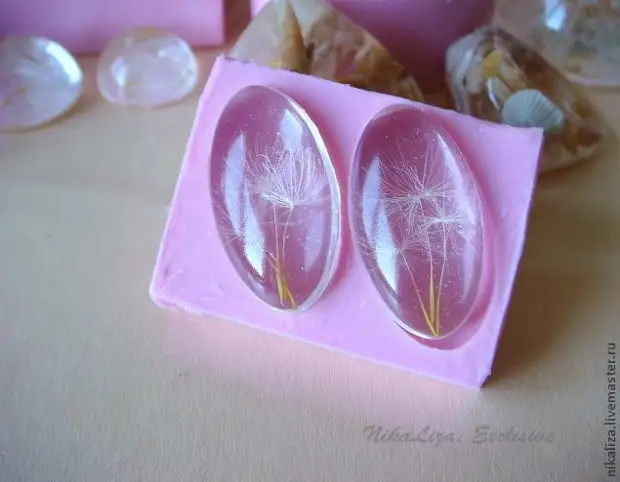
To create a coule from the hemisphere, I picked up two different dandelions so that you can compare how they look in the final version.

Before starting work, we carefully rinse all the molds that plan to use, wipe them dry. Owing gloves, pour the resin into one-time cups and a hardener (it is more convenient to gain them with a syringe). We work in a well-ventilated room.

Measuring the required amount of resin, pour into a clean dry cup, another syringe measure the required amount of hardener and add to the resin. Different producers have their own proportions, so carefully read what is written on the packaging and follow all recommendations for work. The final result depends on the accuracy, if the resin does not frozen, then the proportions were broken, or the mixture is not well mixed with each other.
If you take a syringe with a rubber insert inside, then the hardener will not splash when it is poured into epoxy. Wooden stick (you can use skewers for kebabs) Thoroughly mix the resulting mixture. I set the time for 10 minutes, and interfere with the circular movements so as to prevent air from entering.

In Mold, we put the dandelion neatly (I deleted the lower parachutes with tweezers).

After stirring, I leave the resin somewhere on half an hour so that the chemical reaction passes: to judge that the reaction can be on the heated cup with a resin. Experimed by I installed that it is not necessary to work in very hot weather, the reaction will start very violently leaking and the resin will freeze in the current half an hour. This applies to the resin that I use, different manufacturers - different criteria.
With a thin flowing gently pour a resin into Mold, on a dandelion.

Because After the frozen, it will fall a little, pour so that a small convex lenza turned out.

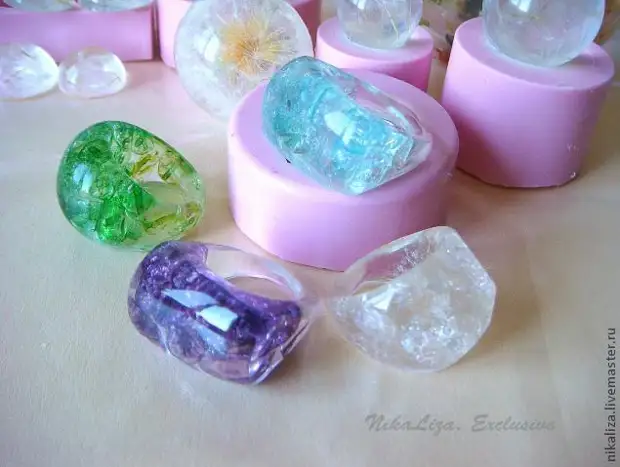
Now I will show how you can make beautiful rings made of glass, washes and polished by the sea.

We pour a little resin, put the pebbles, carefully fill on top, as when working with a hemisphere, to get a convex surface.


Affairs earrings with paracted dandelions. We pour a little resin, distribute a wand. At this stage, the resin begins to gradually thicken, it is just necessary, so that parachuts remain in the position in which they were put.

We put a bunch.

Top pour a resin with a small convexity. If you do it carefully, you will eventually need a minimum grinding.

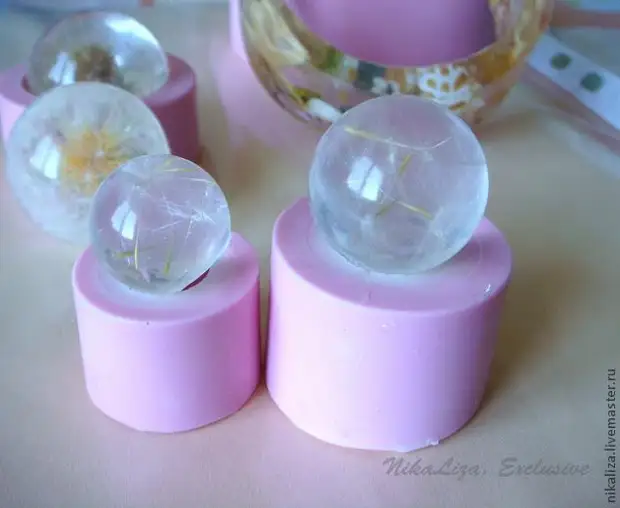
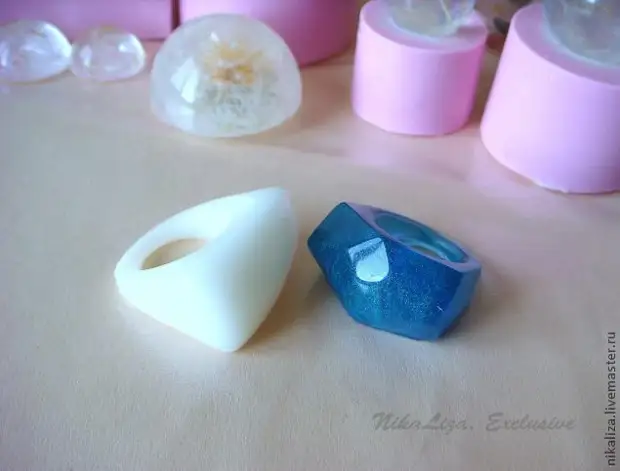
Similarly, a truncated ball is also obtained. Pour a resin half of the Molda.

We put the required number of parachuts with toothpick or, like me, a big needle (it is good to wipe it away from the resin).

Take a resin in Mold with a dandelion.

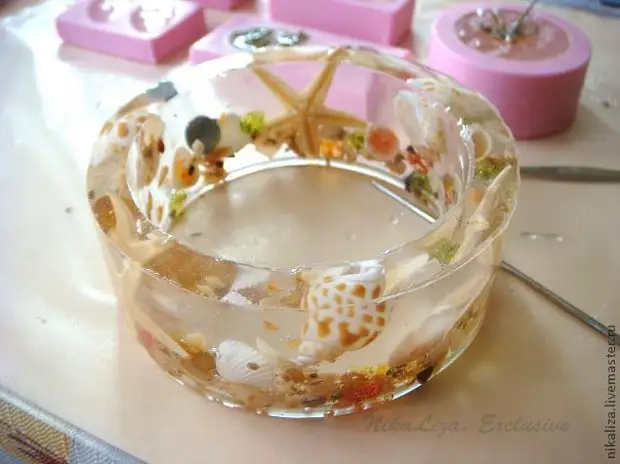
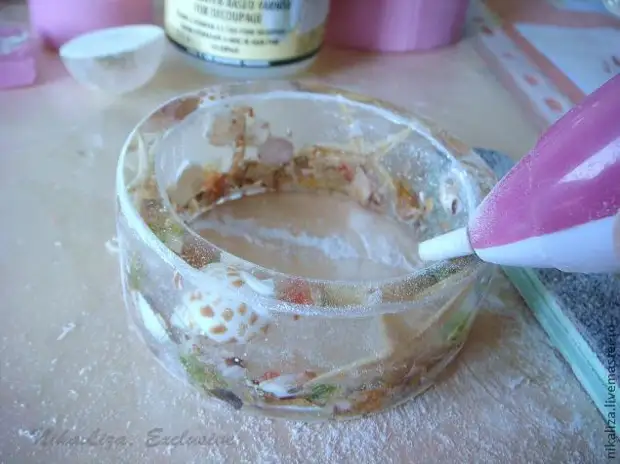
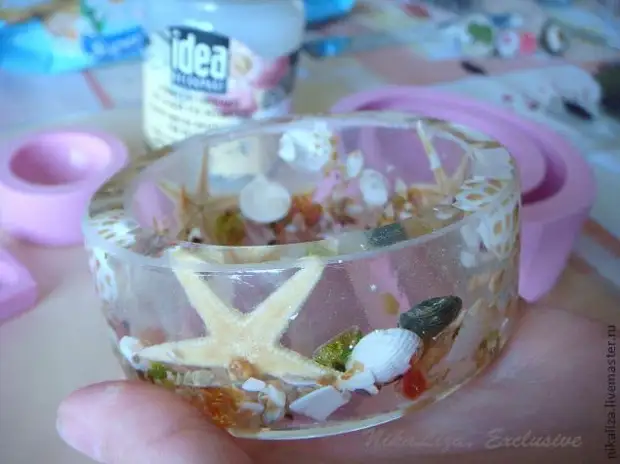
And now we will make a bracelet with seashells from the Black and Azov seas. Similarly, in pure dry bracelet mold pour epoxy resin. By this time it became even more thick, so part of it remains on the walls, which I need. We add to the mold of seashells, pebbles, starfishes, all that is interesting) pour crushed seashells, which stick to the walls, creating an effect of suspended state.

For half an hour before that, I prepared a new portion of the resin, very carefully pour from above to avoid the appearance of unnecessary bubbles. If there are still bubbles, you can warm up the oven to 80 degrees, ventilate, put the Molds there with a resin (the temperatures are withstanding to + 204 c). Bubbles will come out.
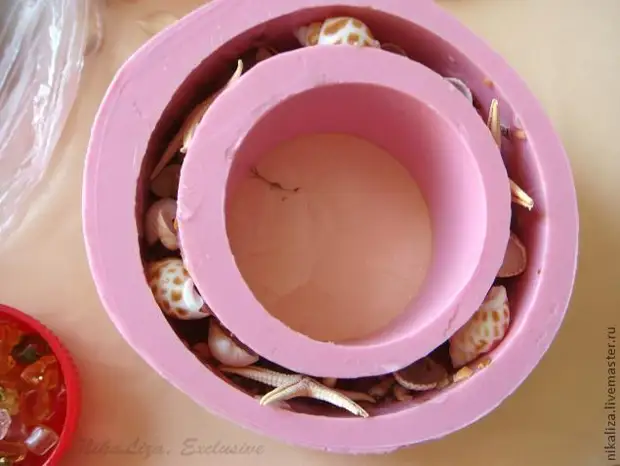
It is important that Mold stands on a flat surface, otherwise the resin will freeze in the inclined position. Than more accurately install epoxy, the less you will need to grind. I poured resin as much as possible to the top, with a small convexity.
Now we are waiting for a day to completely dry the resin. To the surface of the products did not hit the garbage / dust, it is necessary to cover them with something, a box, lid.
At this time we will make a pendant. We prepare the main background - we apply a liquid plastic on the workpiece. Polymer clay rolled into a thin layer cover, distribute and baked in the oven. Let cool and you can start work.
We pour a few drops of resin so that you can distribute on the surface and with the help of tweezers and needles make up of the fully dried leaves - flowerfish composition. The resin acts as glue, which does not allow easy drunks to move. You should not use living or poorly dried flowers for pouring resin, over time they will ruin and turn them.
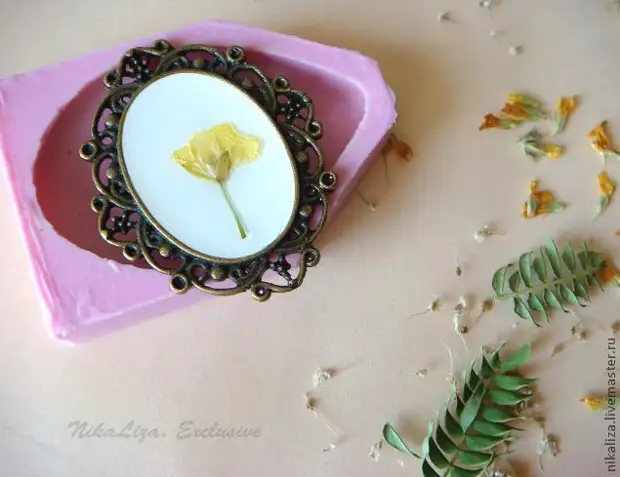
Because Behind the pendant there is a holder, I had to put it in Mold so that the surface was horizontal. I never think about it in advance what kind of composition should be, so I spread all the appropriate flowers and the grass and inspired to collect a small live picture.
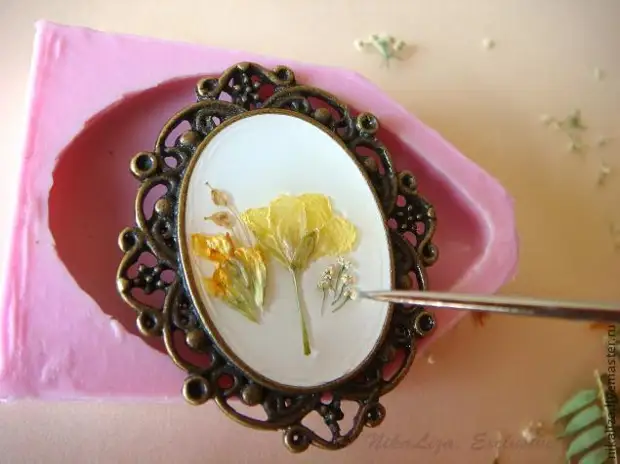
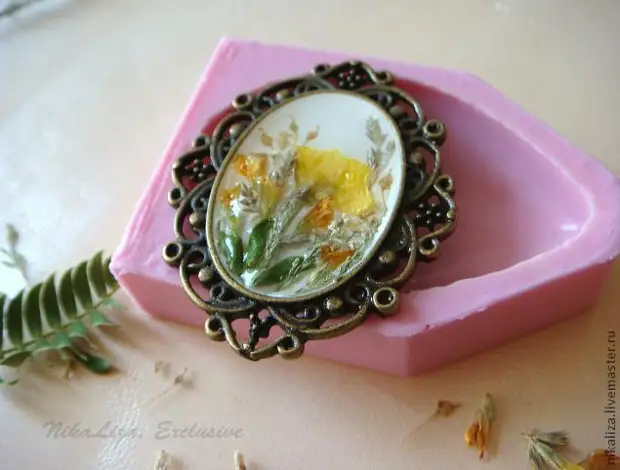
As a result, it turns out in such a little world. We leave to dry, after the resin holes, you can pour out the second layer, forming a convex beautiful lens.
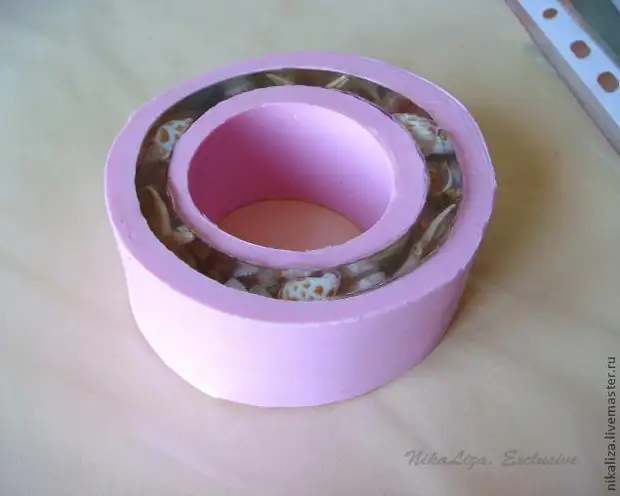
A day passed, the resin completely turned away and I got all the resulting blanks. This bracelet, the upper part of it.
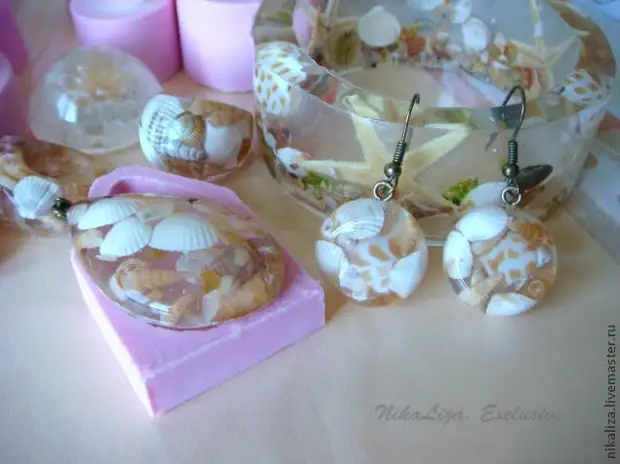
By the same principle you can make a pendant, earrings, ring, etc.
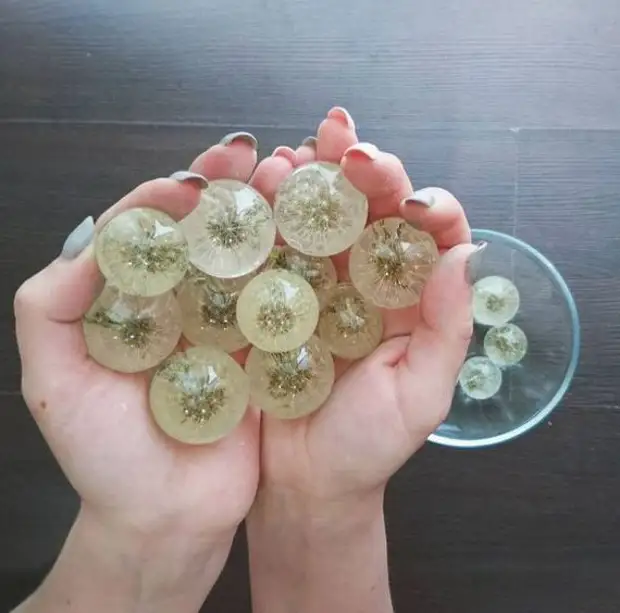
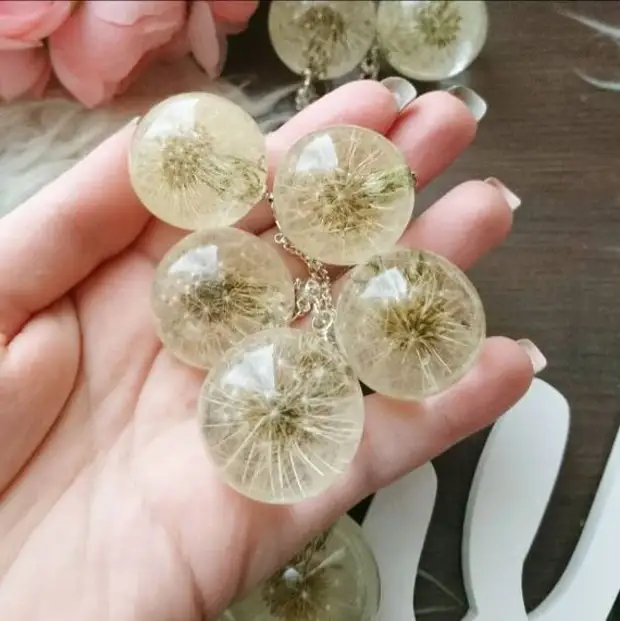
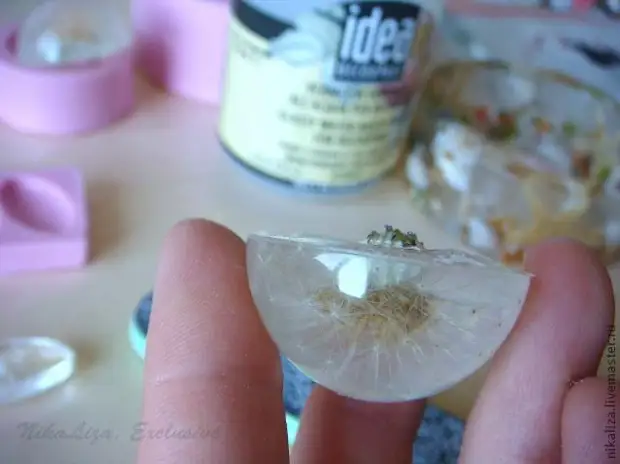
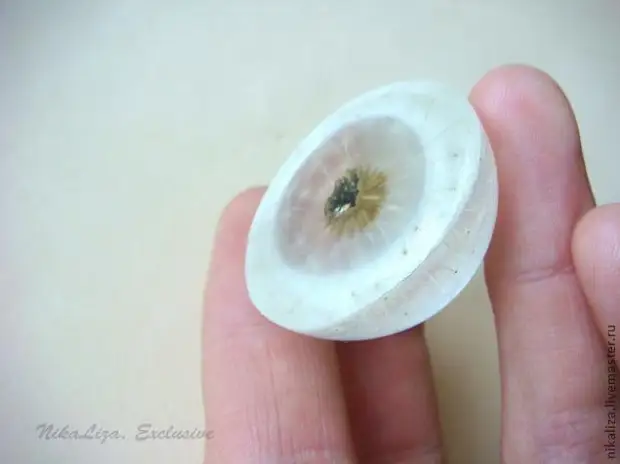
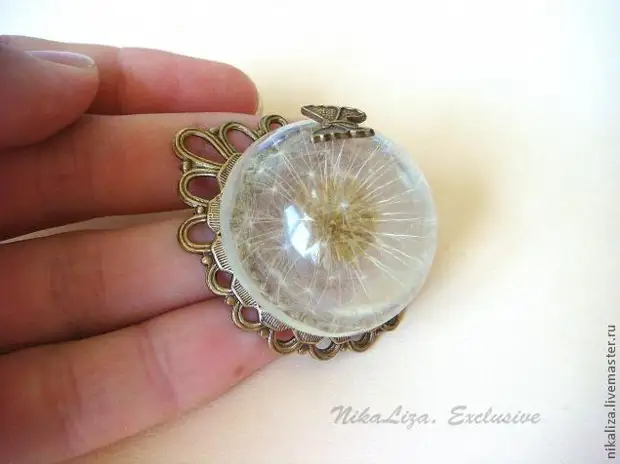
This is a semisfer with a dandelion, next to the second, orange, for comparison.

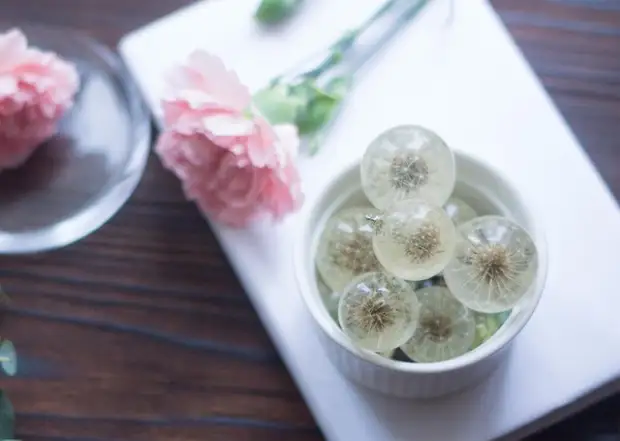
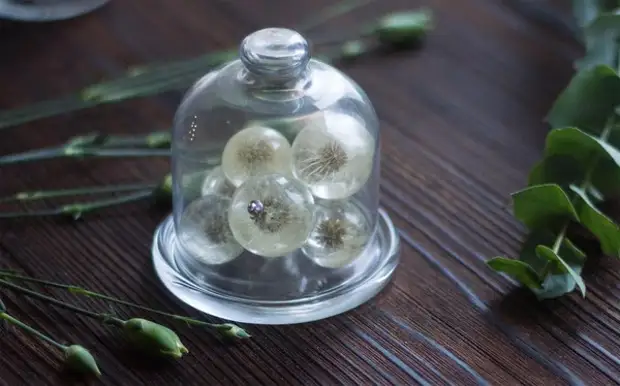
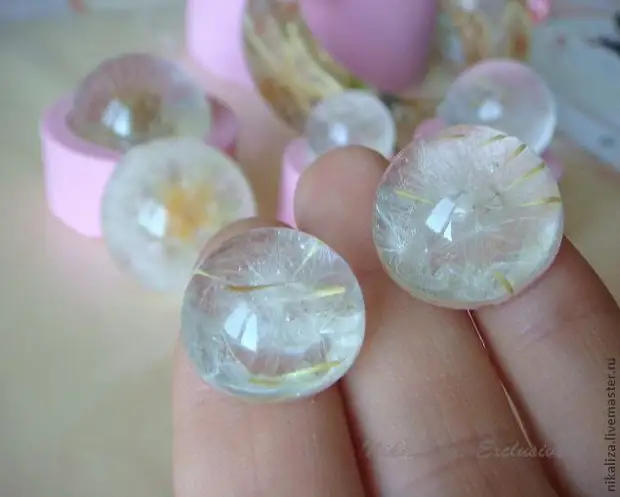
These are the resulting truncated balls with parachutes:
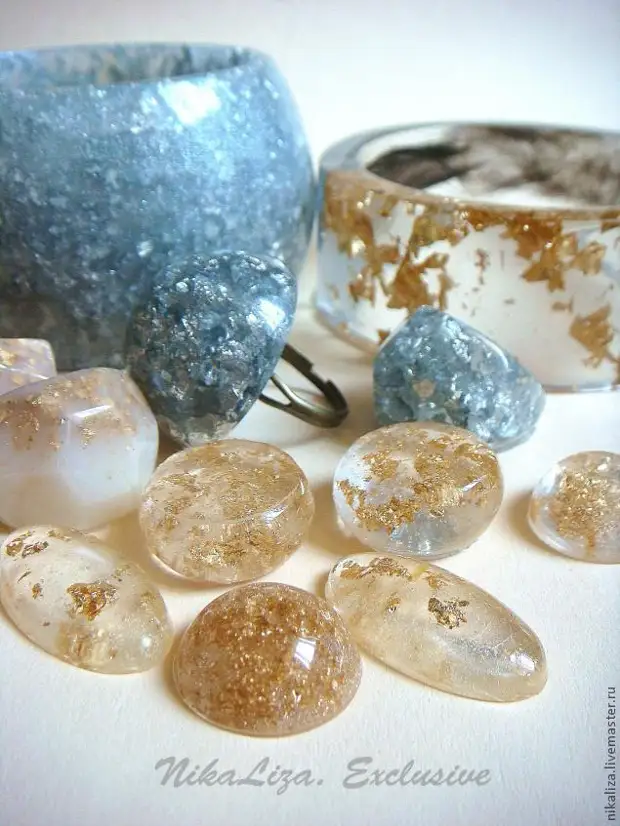
I also poured small seeds:
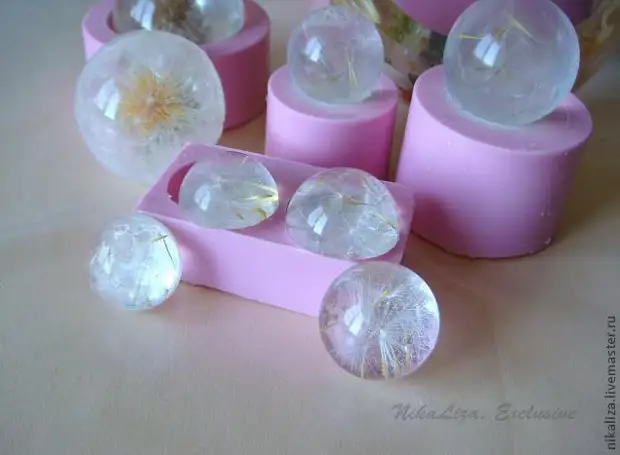
Slashing from sea glass, for comparison, put those that did earlier.
If in the resin add a droplet of stained in paint or powder, then you can get different shades of resin. When painting stained glass paint it is worth adding a completely droplet, because The proportions between the resin and the hardener can be violated by staining, as a result, the product may not be frozen or becomes sticky when touched.
You can add Patal and get interesting decorations.
And these are lenses with parachutics, as can be seen, lie beautifully. So, as it was intended.
The reverse side remained at one level with the edges of the lenses.
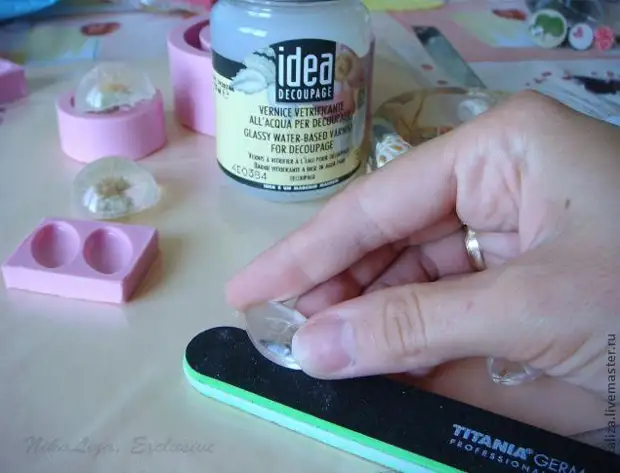
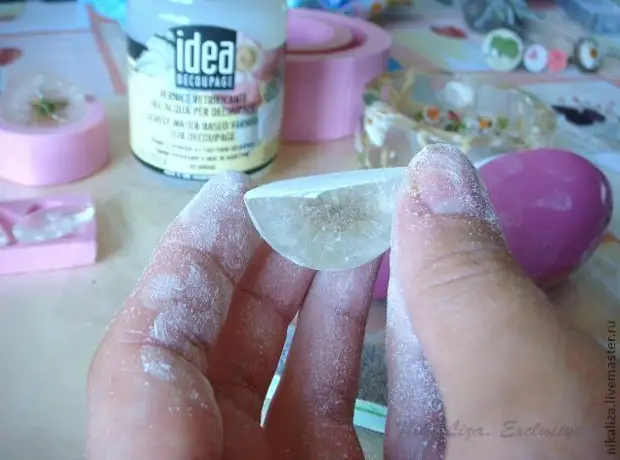
After complete frost, uneven and sharp edges must be stuck.
This is how the back side of the coulon looks like after frozen resin.
Thoroughly grind, and in order not to breathe dust, you can wear a mask / respirator.
Rear of the hemisphere after grinding
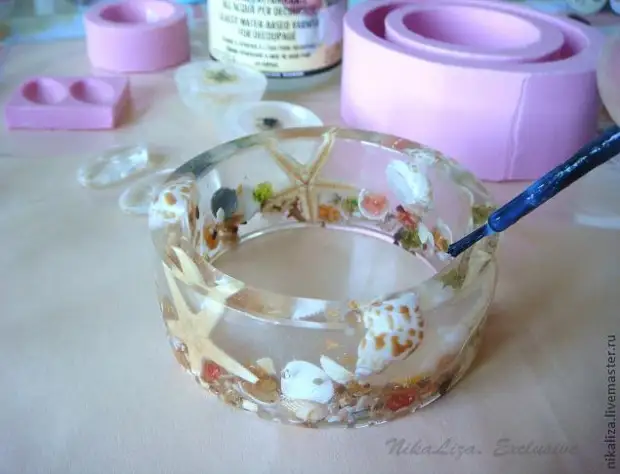
We also do the same with the bracelet, you can take a manicure machine on assistants, as I did, most importantly, buy good batteries.
As can be seen in the photo, I needed a minimal grinding along the edge of the bracelet, because I took care of it in advance when I poured a resin into Mold.
Cover the places of grinding varnish, I have it a glassy varnish, the layer is the most minimal.
When the lacquer dries, you can admire the result.

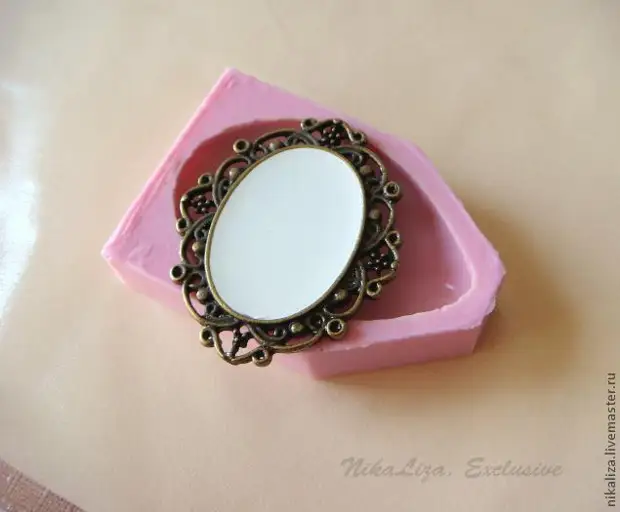
For a beautiful quince, I picked up an equally beautiful, decent frame and decorated with a miniature butterfly.
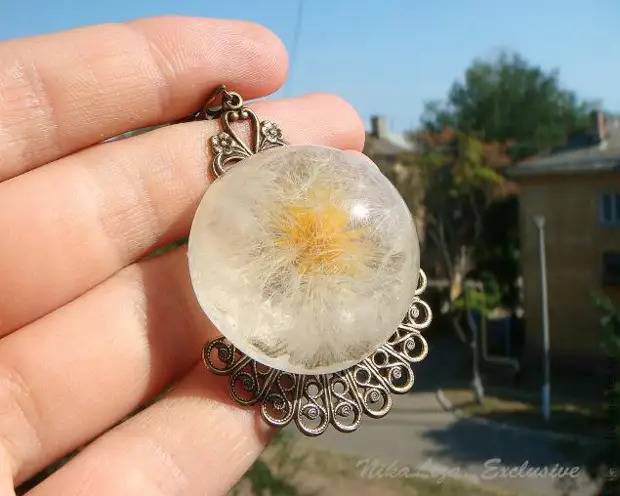
The second dandelion, with an orange middle:
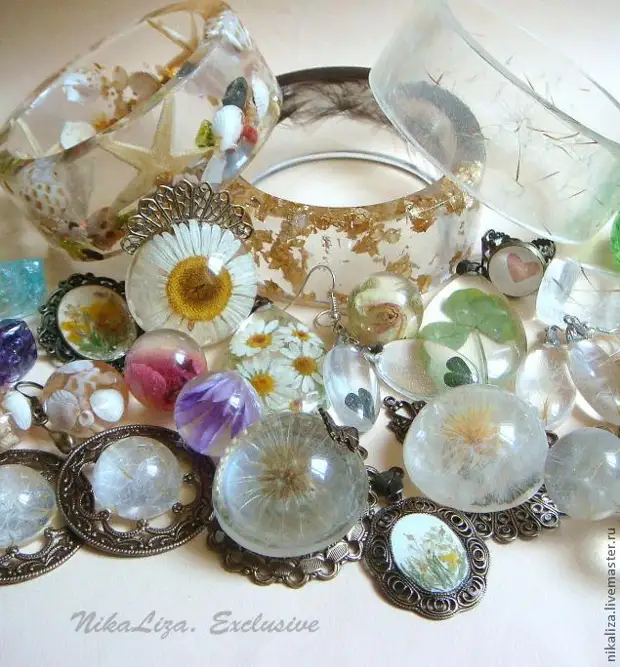
Thanks to this amazing material, like a jewelry epoxy resin, you can do the most incredible things:
A source